Table of Contents
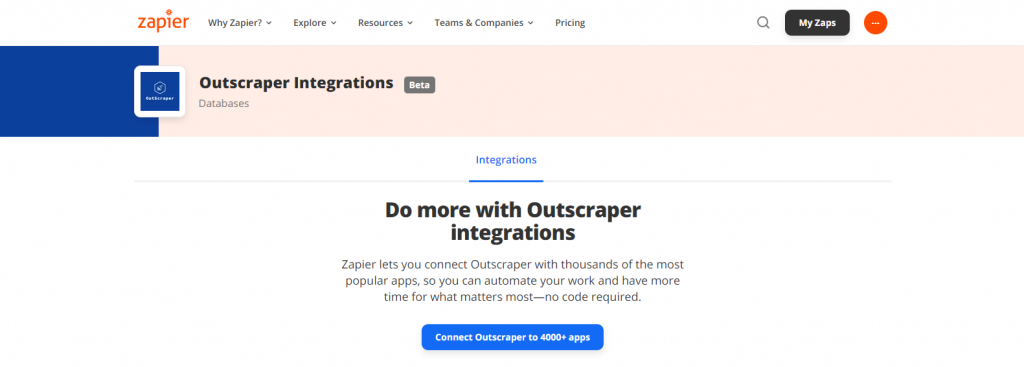
We have good news. Outscraper has Zapier integrations now. Zapier is a service that connects and automates thousands of different web applications. So that you can do more with Outscraper and Zapier integrations for your tasks, projects, and business.
In this article, you can learn how to use Outscraper Zapier integrations to create workflows.
Configuring the Integrations
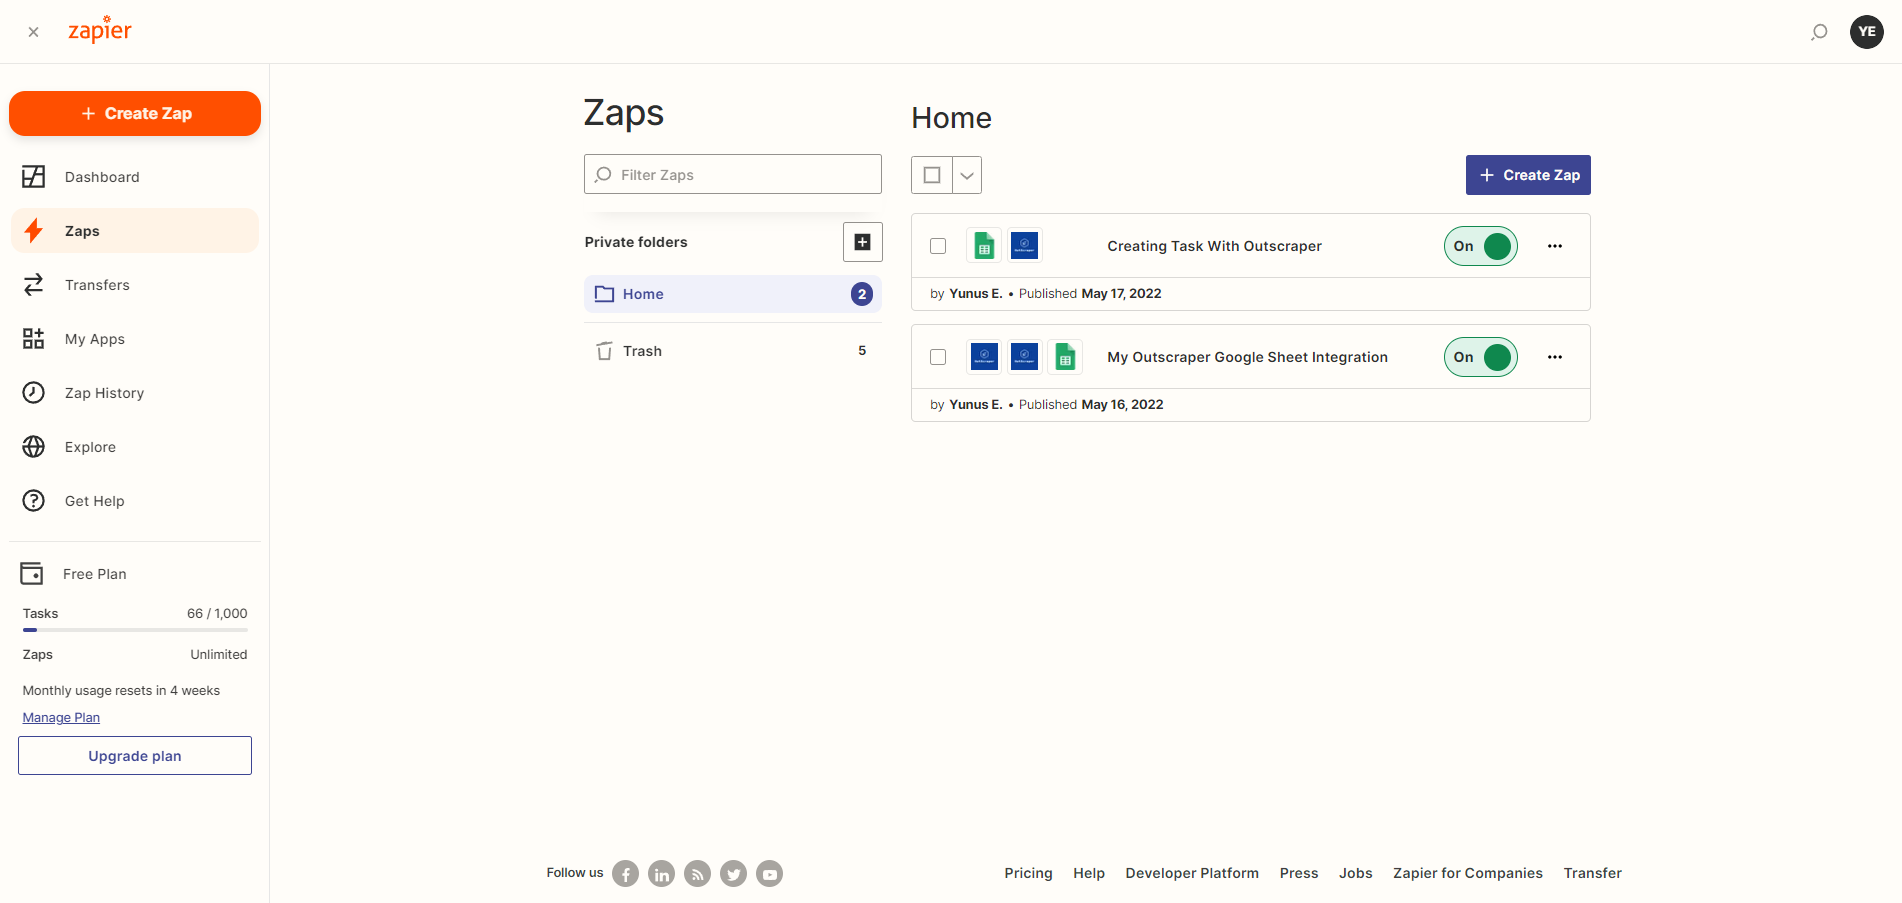
Ready-made workflow templates can be used to configure Zapier integrations. Also, you can manually create your own workflows between zaps according to your demands. “Archive newly-finished Outscraper tasks in Google Sheets rows” integrations are ready to use now.
Outscraper Integrations
All available integrations can be viewed on Zapier’s Outscraper page. You can visit the Outscraper Zapier page directly, or you can use the search bar to find the integrations.

Zapier Outscraper Integrations Page: https://zapier.com/apps/outscraper-ca1391/integrations
Archive Newly-finished Outscraper Tasks in Google Sheets Rows
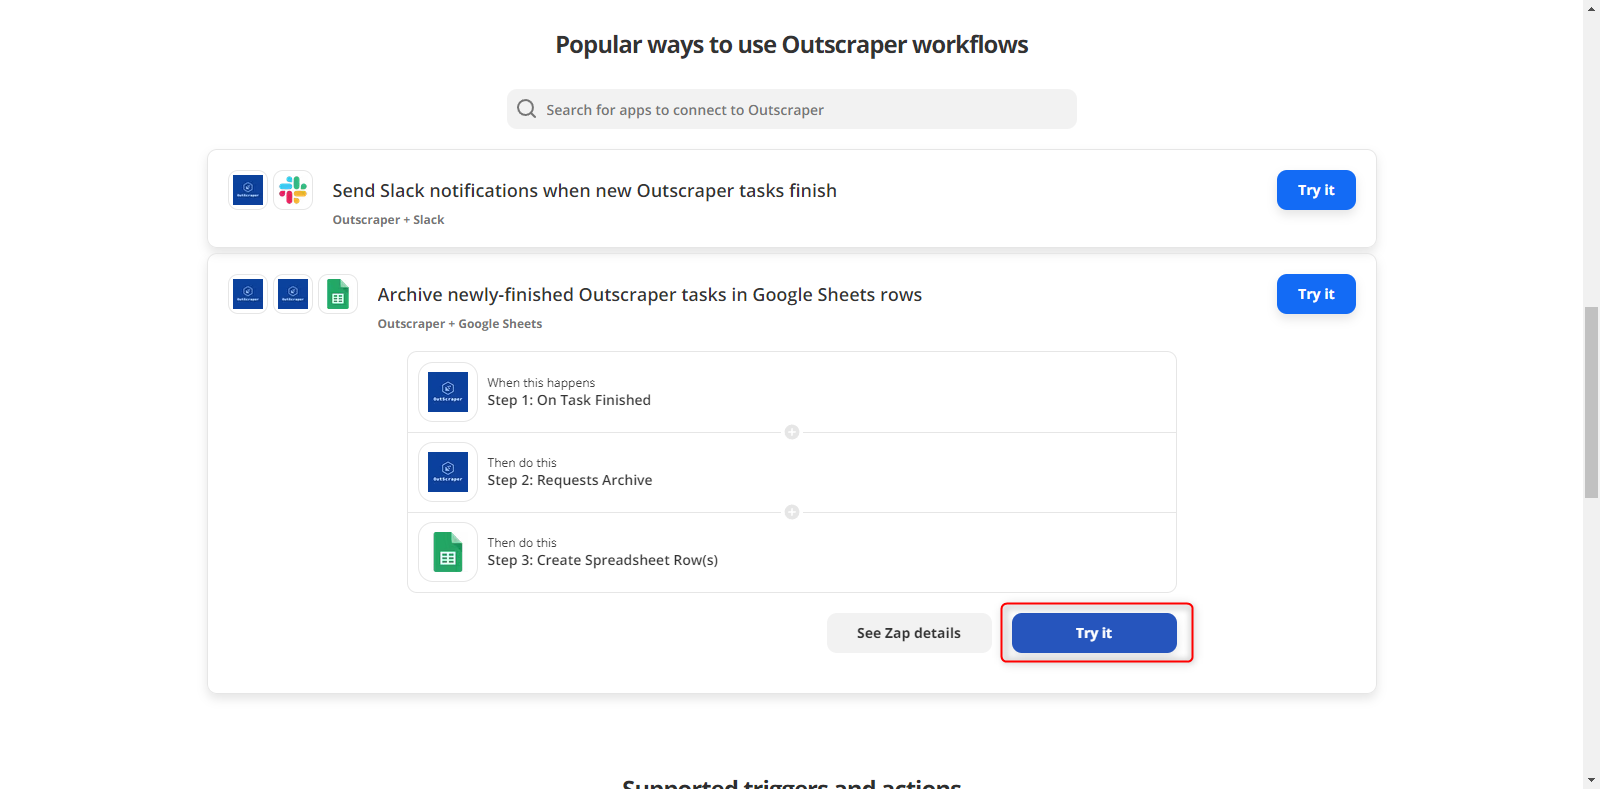
Among the listed Outscraper workflows, find the “Archive newly-finished Outscraper tasks in Google Sheets rows” integration and click the try it button.
Integration Setup
When you press the ‘Try it’ button, Zapier brings up a setup screen in front of you. The setup section consists of 3 parts.
Trigger: On Task Finished in Outscraper
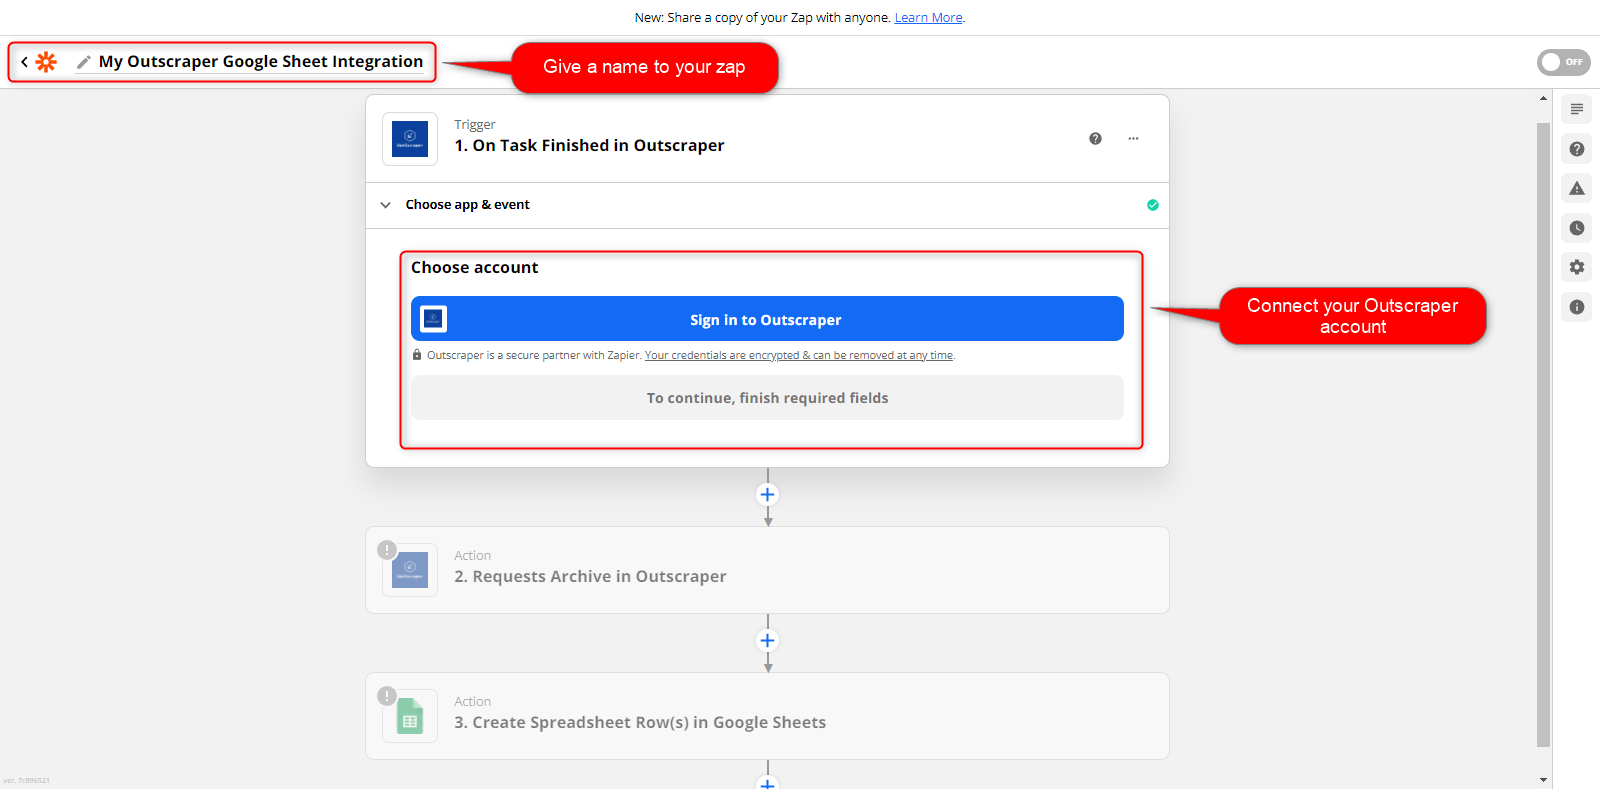
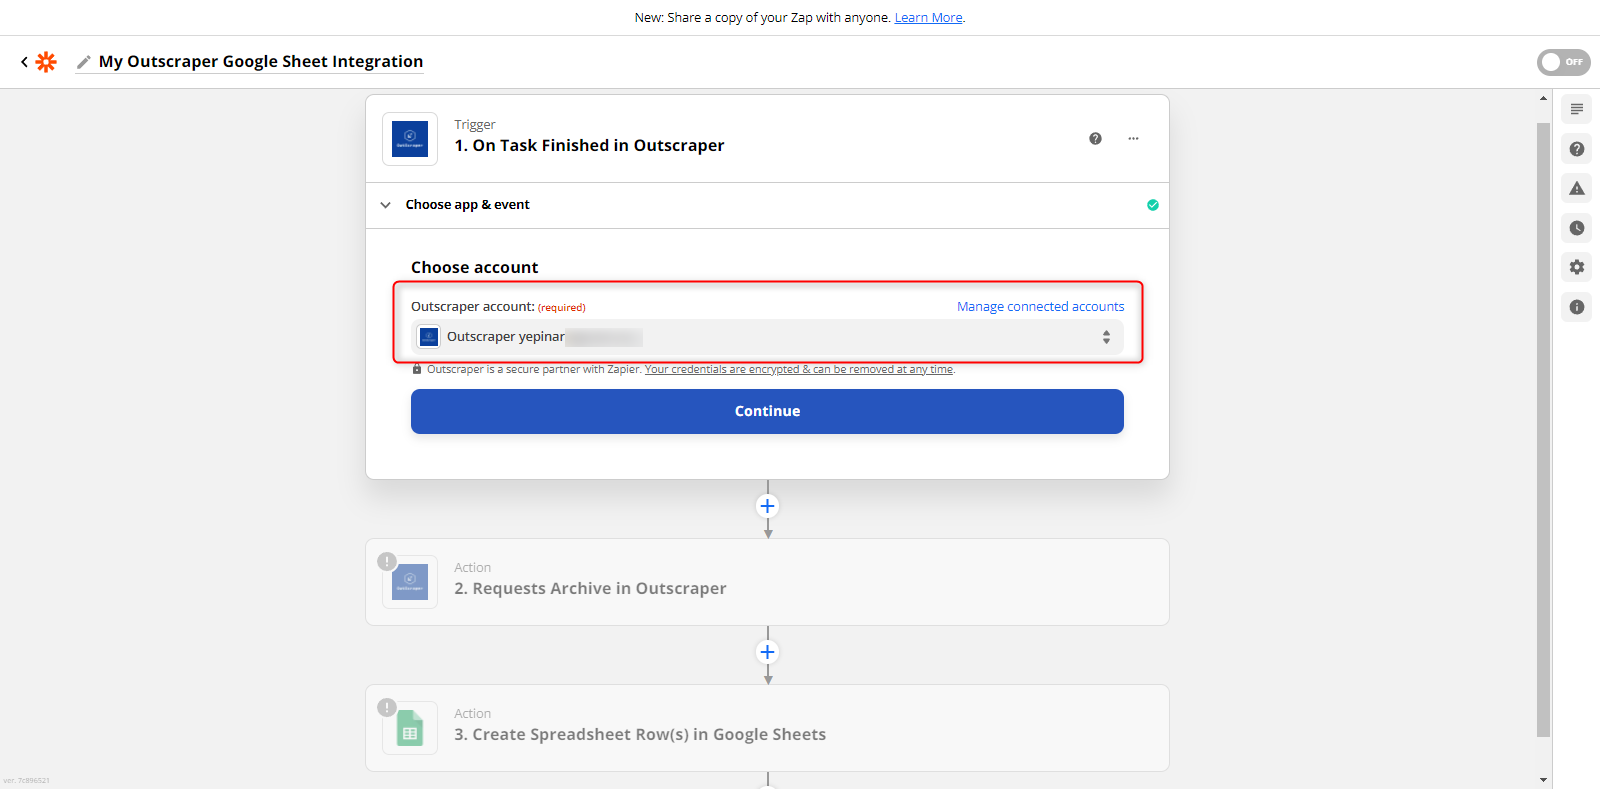
On this screen, you can specify a name for the Zap. Zapier will guide you step-by-step. First, you need to link your Outscraper account to Zapier.

After pressing the ‘Sign in to Outscraper’ butto, a pop-up will appear and asking for the API Token you need to get from Outscraper.
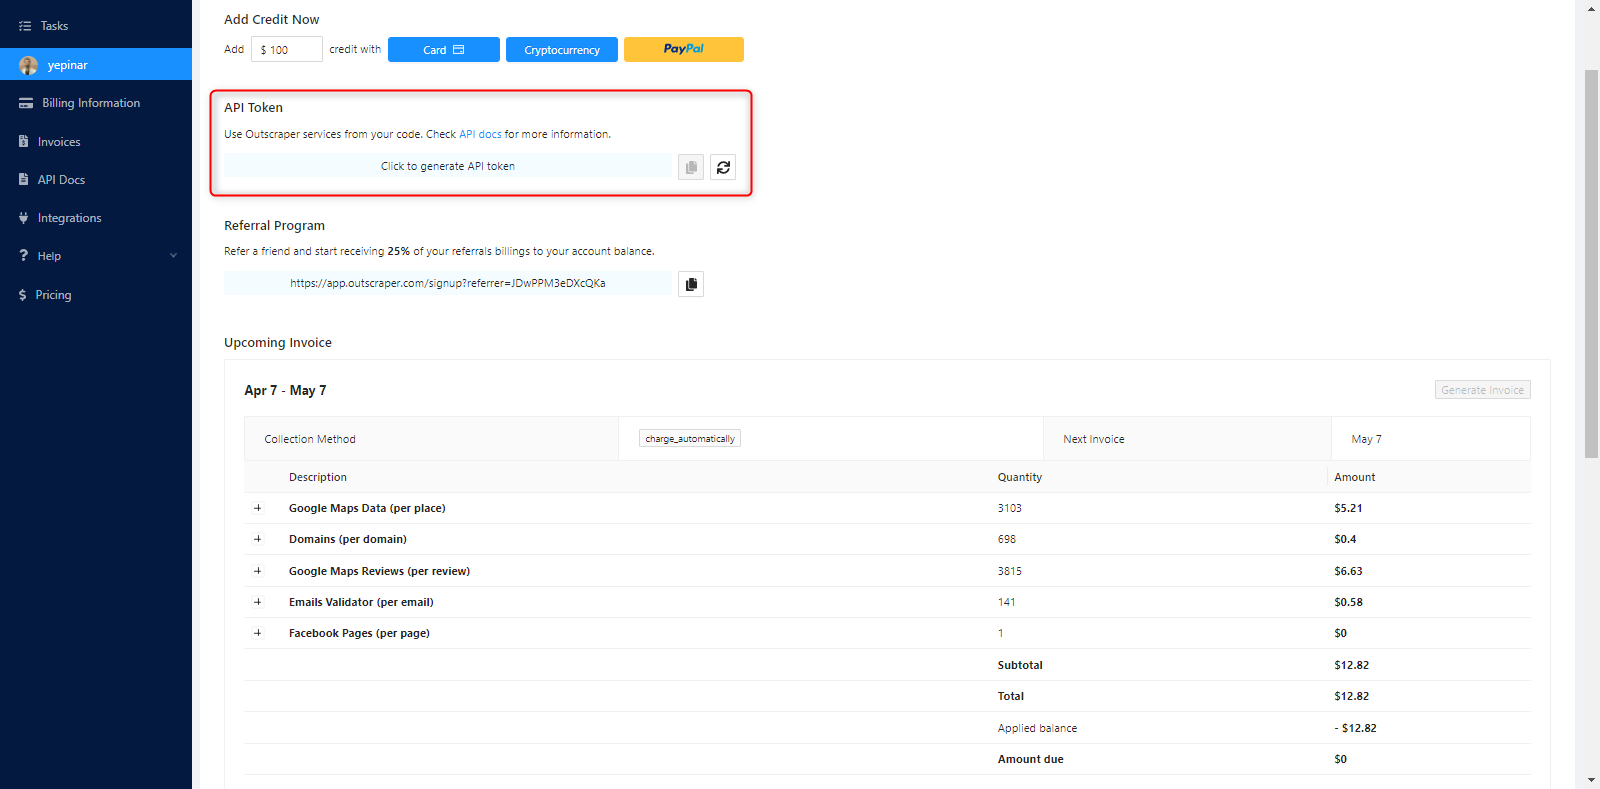
The API Token generating tool can be found on the profile page: https://app.outscraper.com/profile
Just click the “Click to generate API token” text and wait for the result.
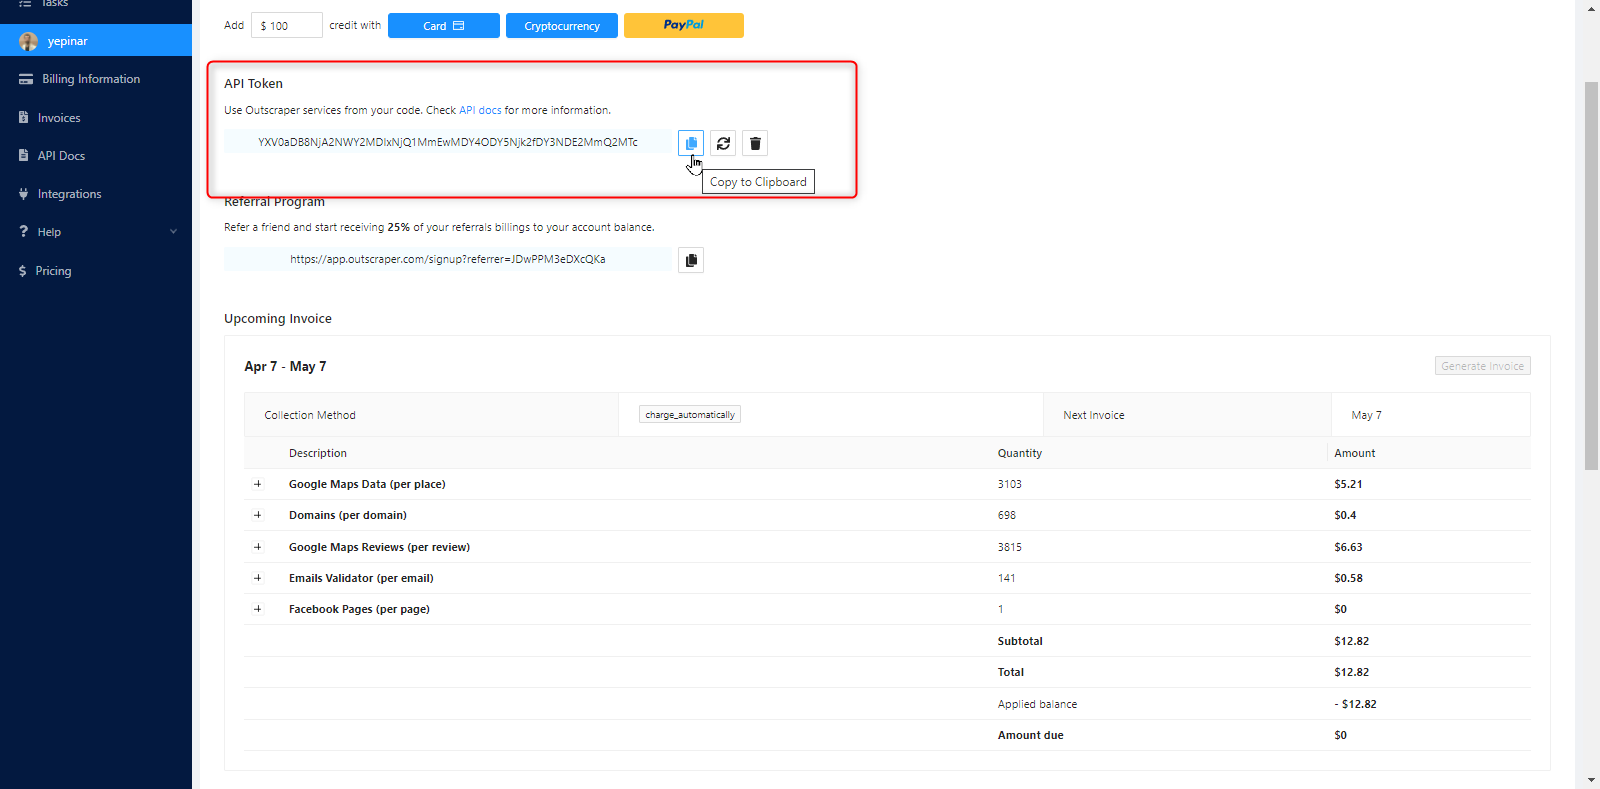
Now, copy the API token to the clipboard, which is specially generated for you, and paste it into the pop-up box opened by Zapier. Then click the ‘Yes, continue’ button.

Zapier will save the API Token you entered and return you to the setup screen. Now you can see the e-mail address you defined in the “Outscraper account: (required)” field.
In the next step, Zapier will want to run a trigger test. In the next step, Zapier will want to run a trigger test. It will check the existence of a recent task and see if it matches the account connected.
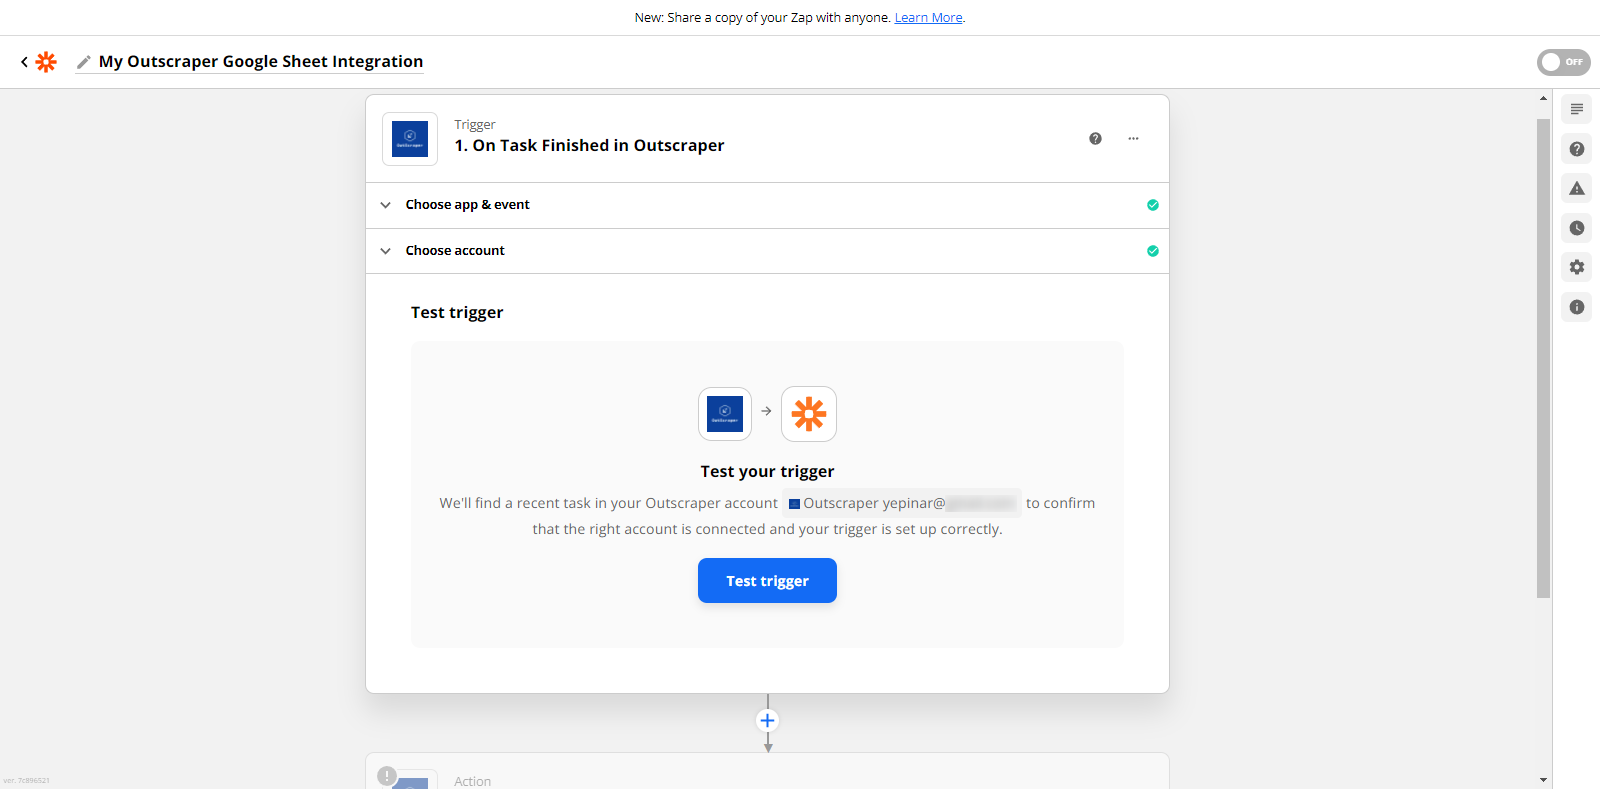
Press the test trigger button and wait for the test result.
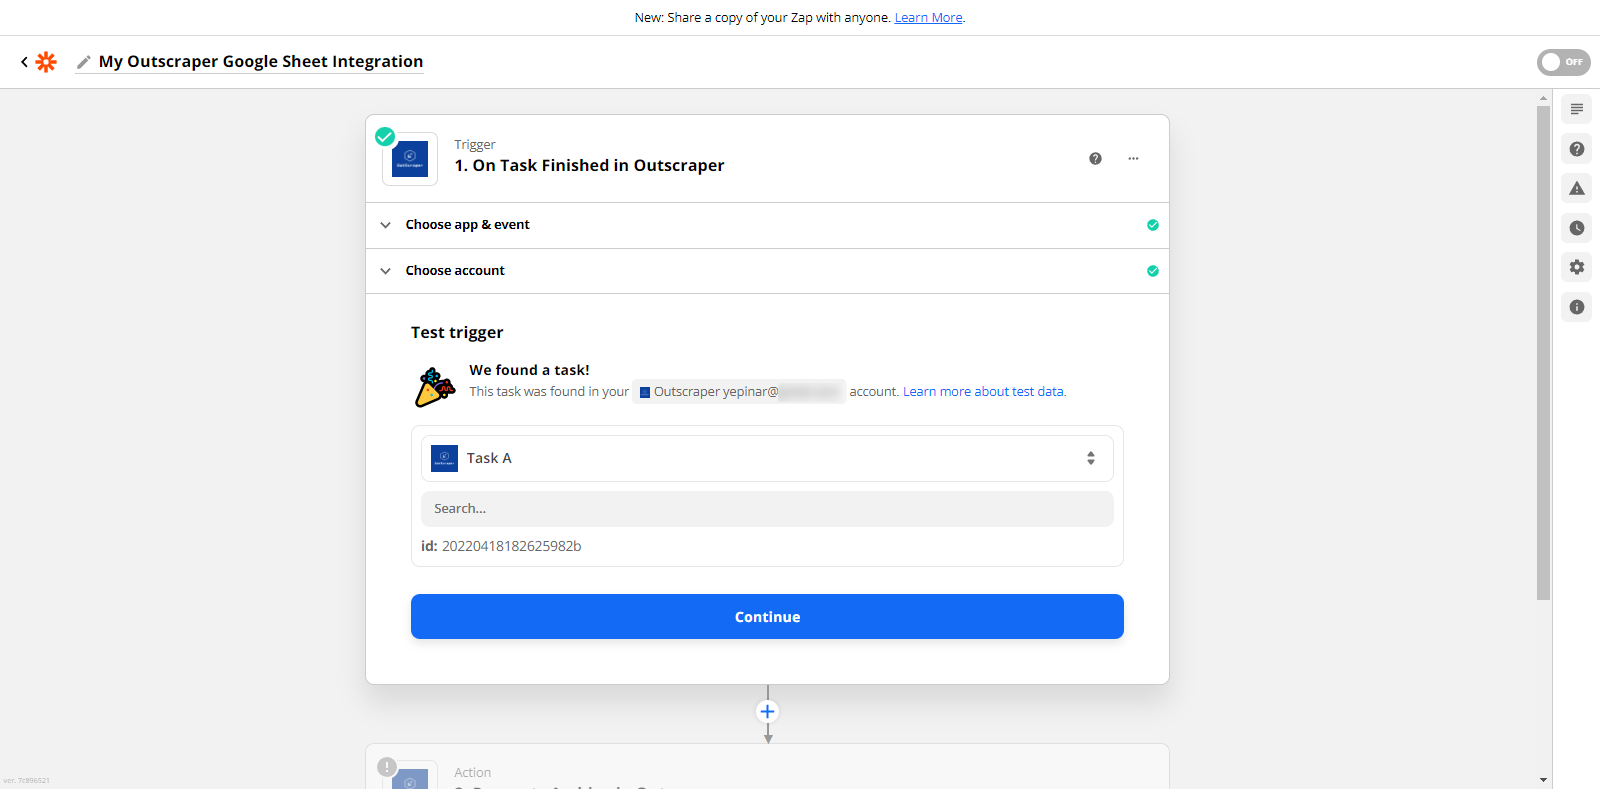
The task has been successfully founded on the account, and you are ready to continue.
Action: Requests Archive in Outscraper
In this second part, it is necessary to determine what action Zapier will take on the Outscraper side. The ‘Request Archive’ action is automatically selected.
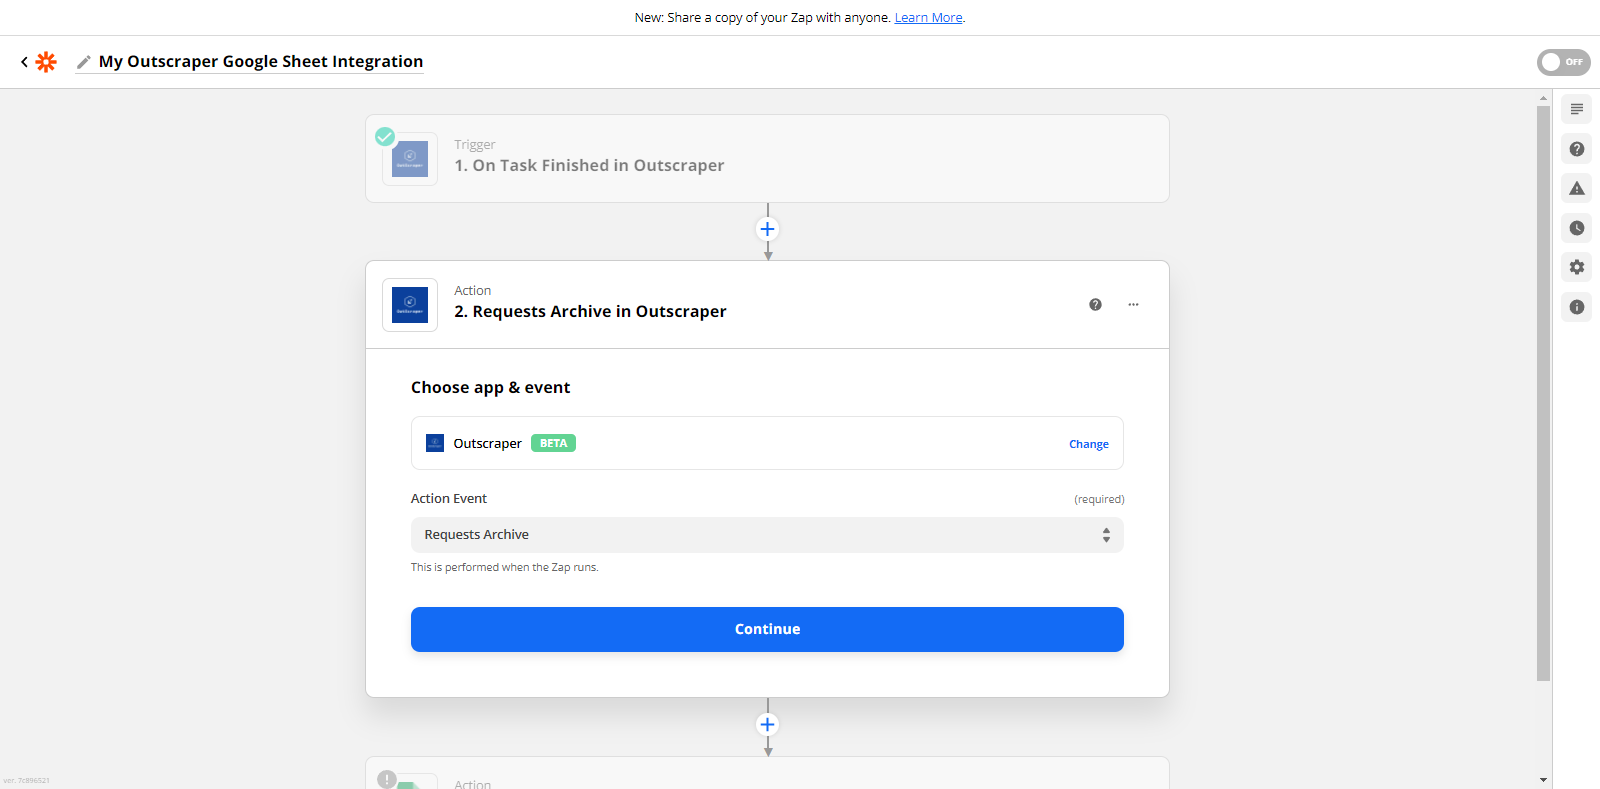
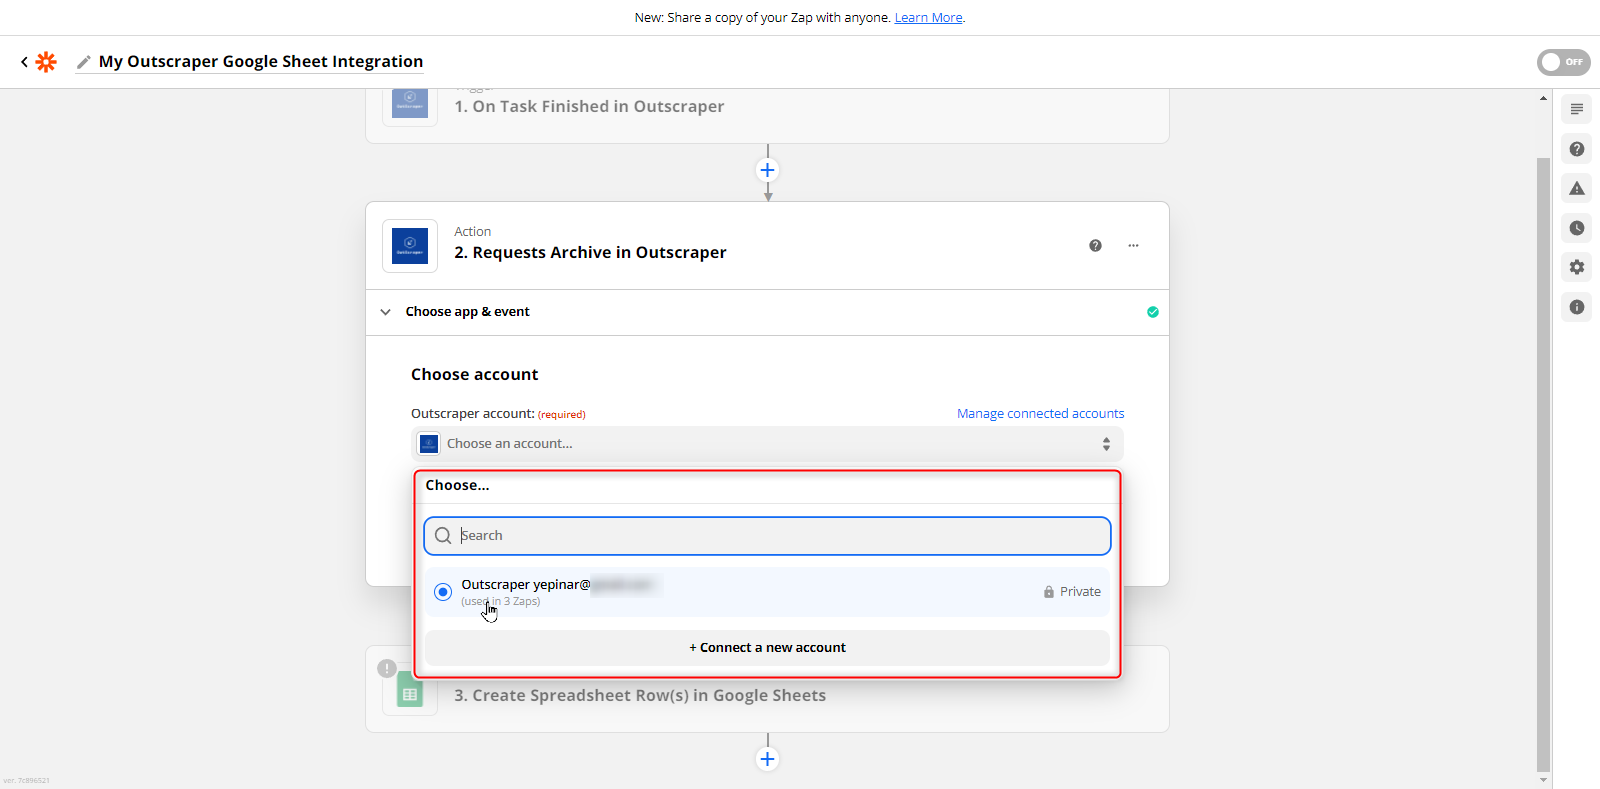
Directly click the continue button to setup the next step. It will ask you to choose your account from the list again.
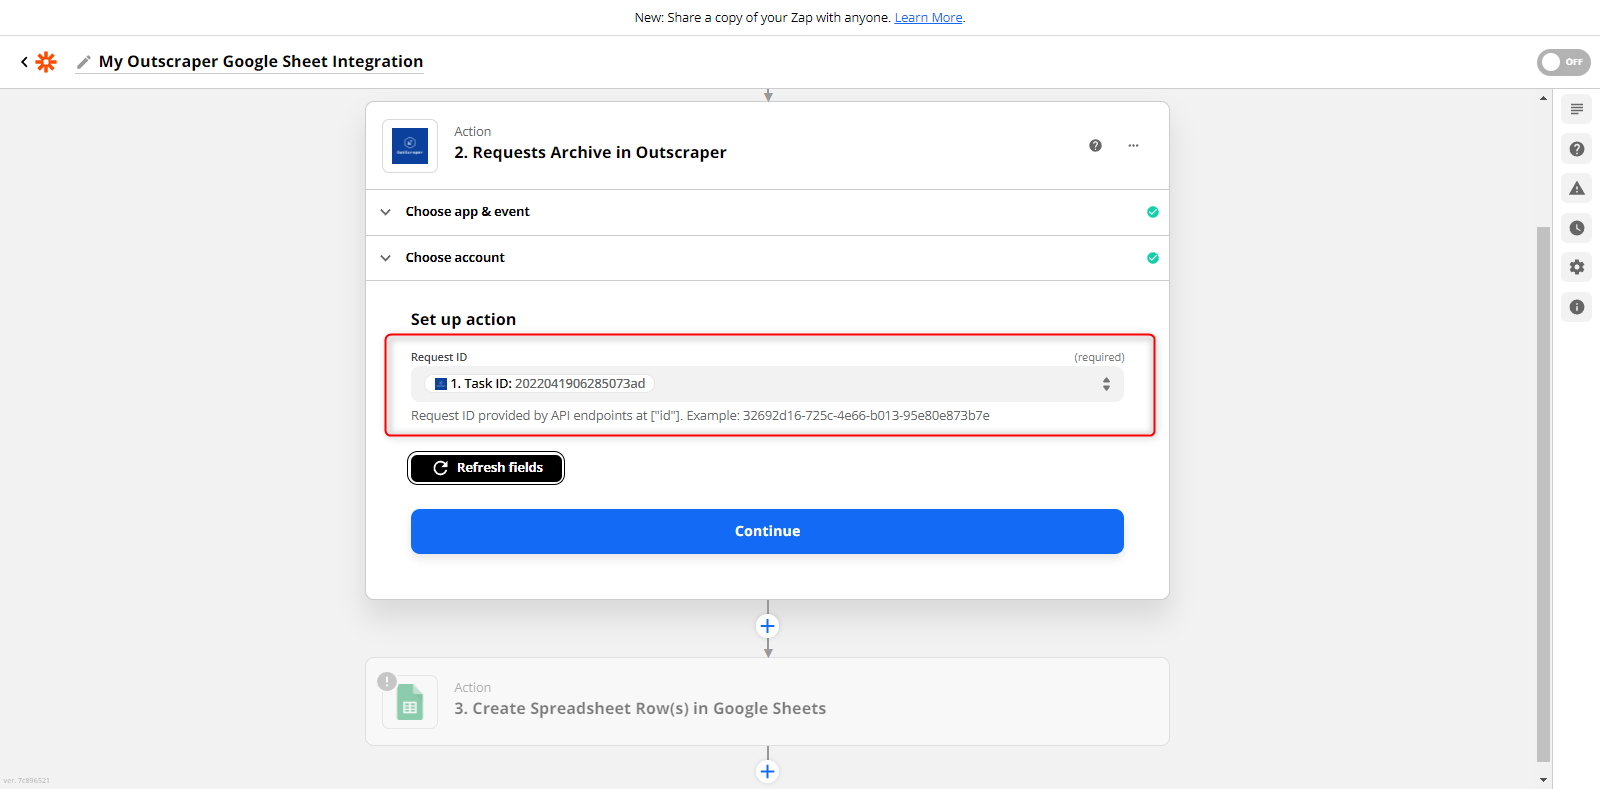
It will show the details of the recent task created in Outscraper when you select the account and proceed to the next step. If you see a task ID in the Request ID section, just continue directly to the next step.
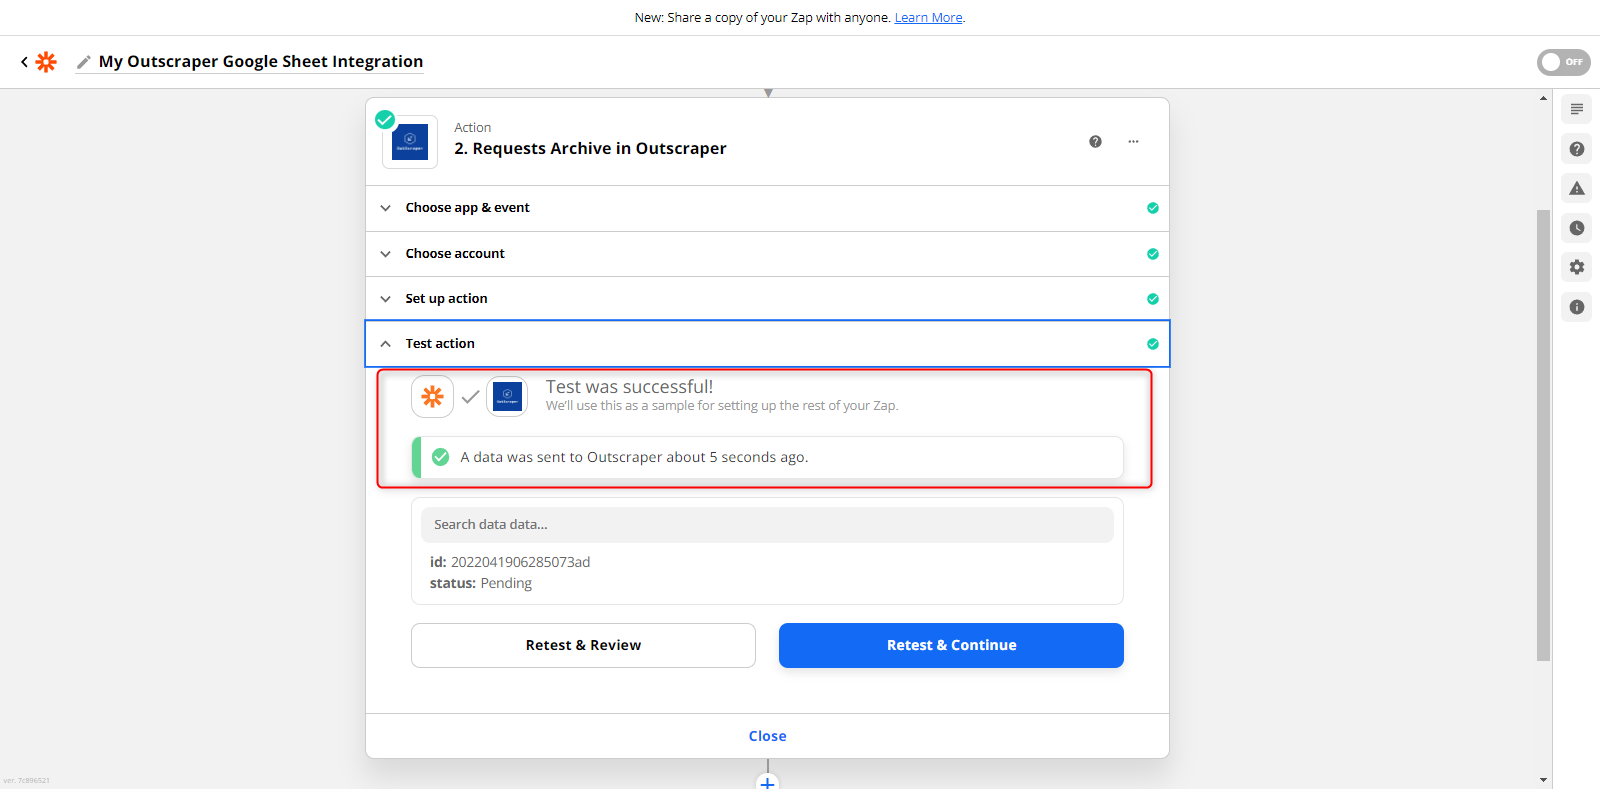
Zapier will want to test the Outscraper connection. Click ‘Test & Continue’ and wait for the test result.
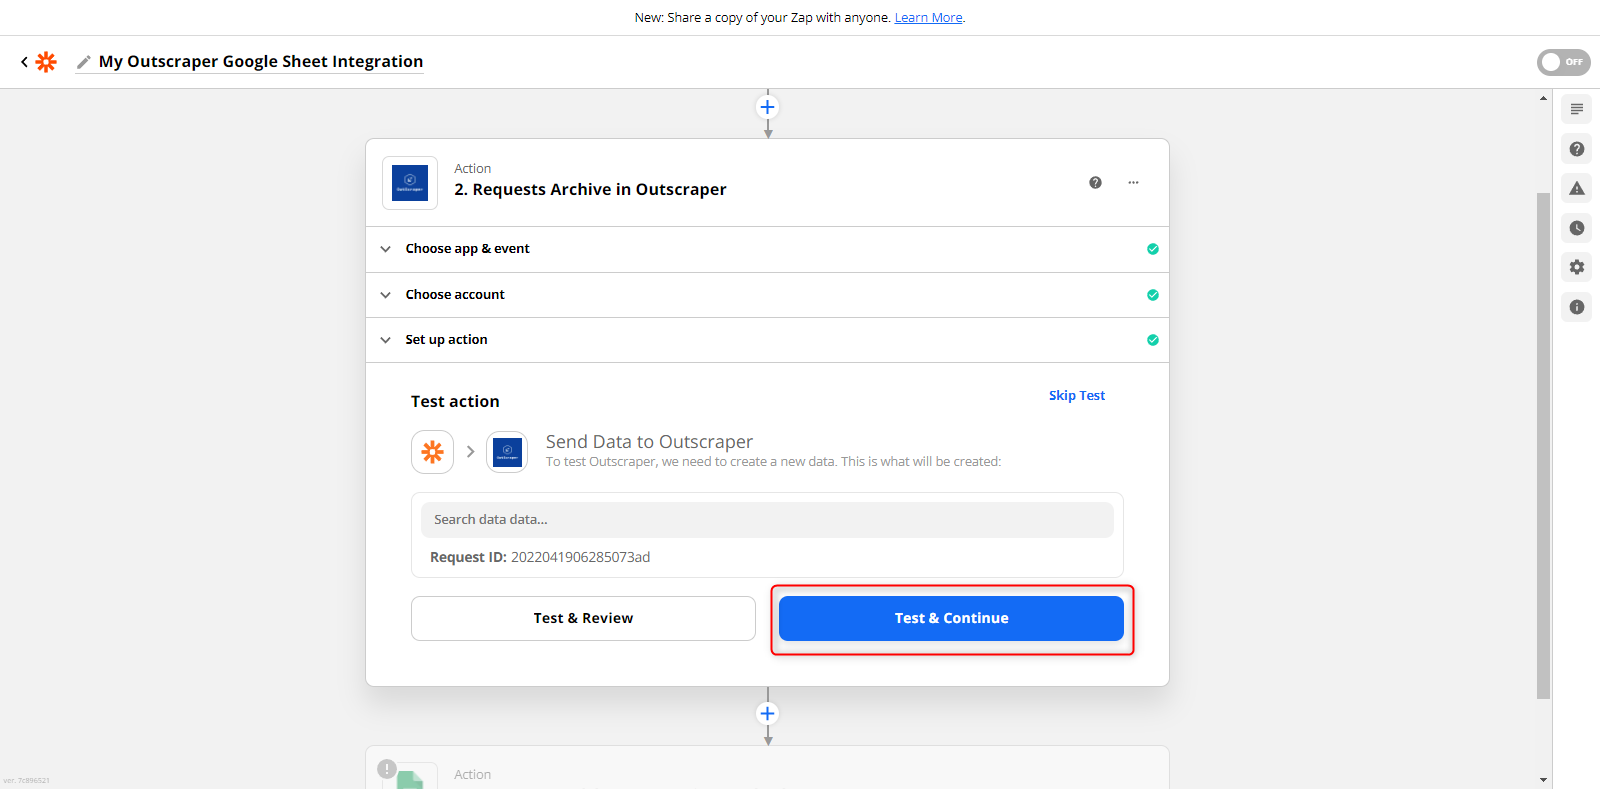
When the test is successful, the setup step will jump directly to “Action: 3. Create Multiple Spreadsheet Rows to Google Sheets.” You could check manually for the test results.
Action: Create Multiple Spreadsheet Rows to Google Sheets
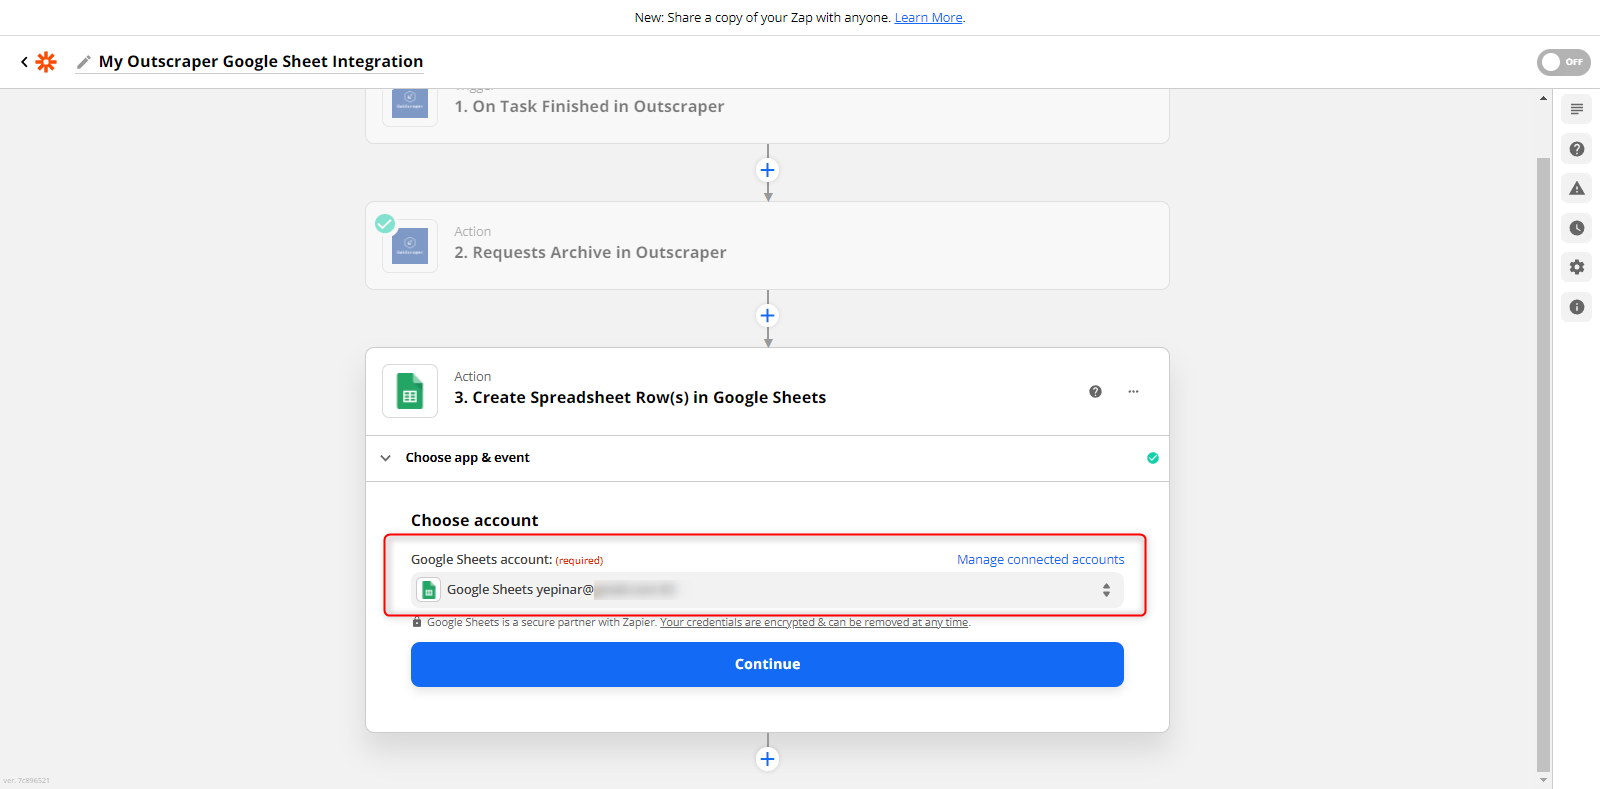
You have reached the last step on the setup screen. It will ask you to link your account for the Google Sheet integration.
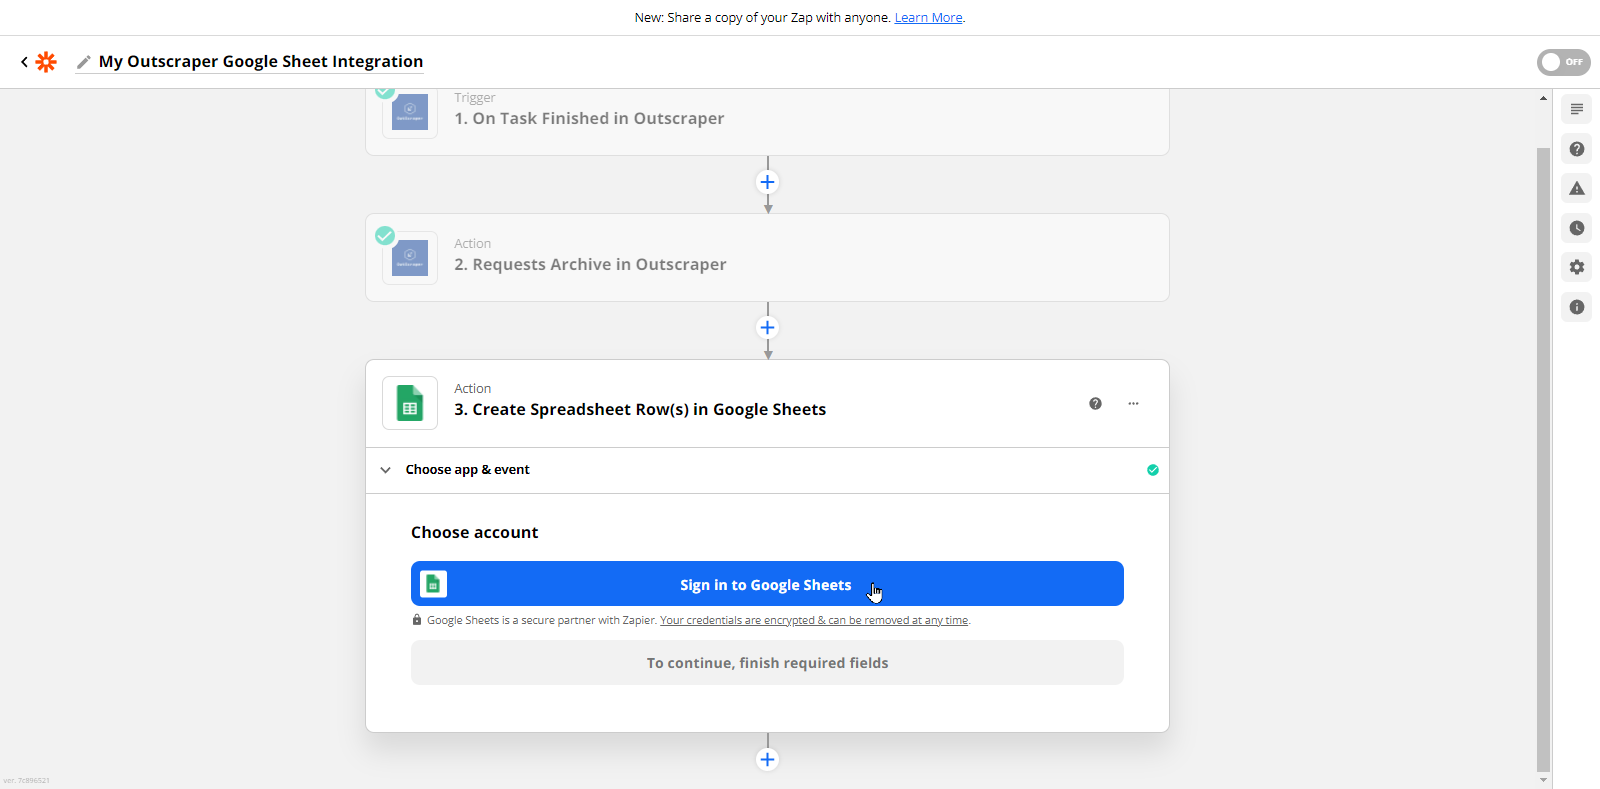
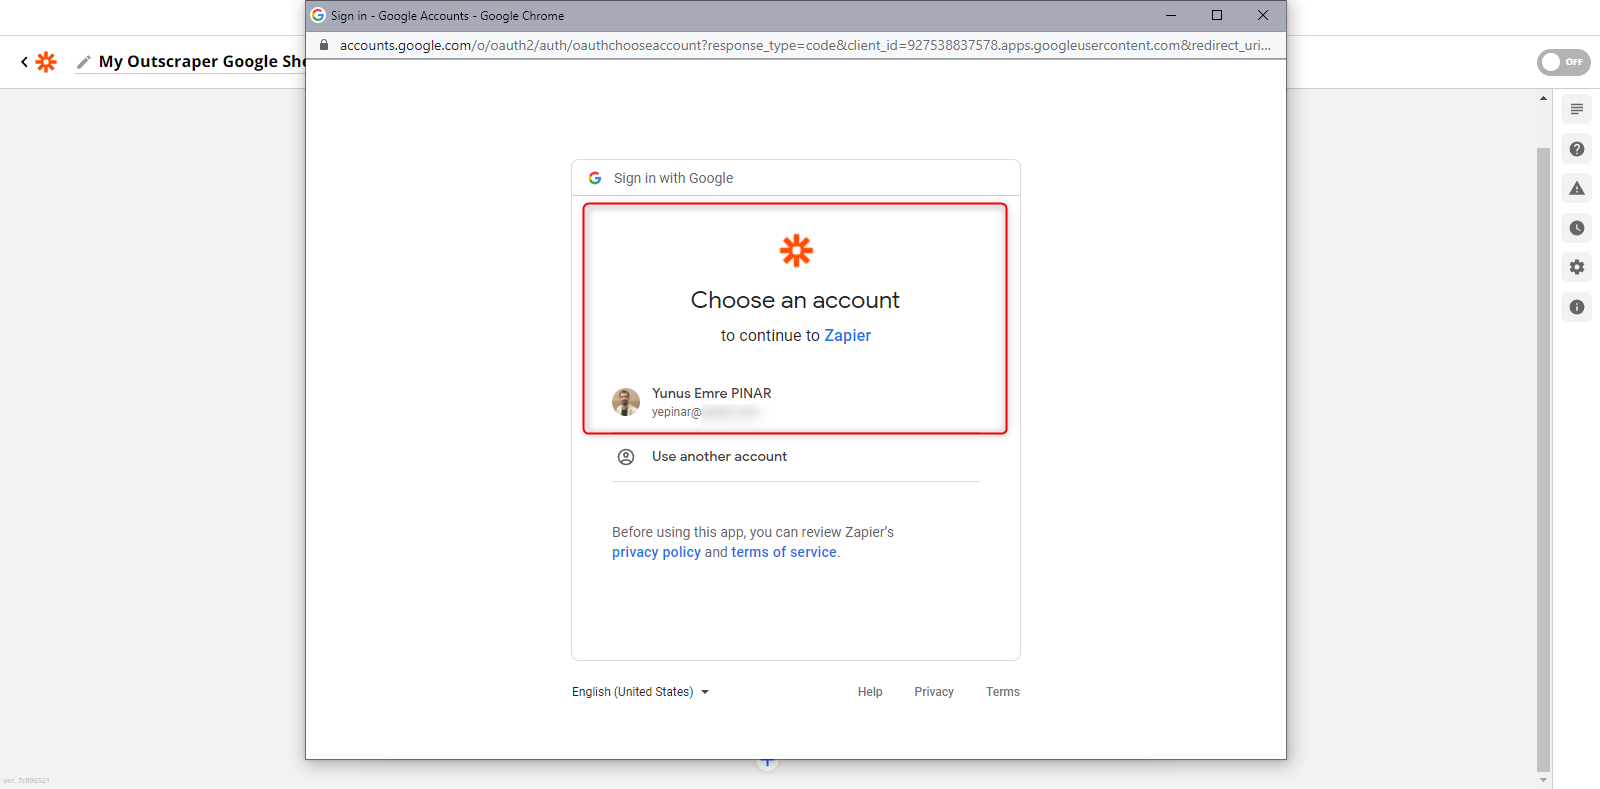
A pop-up will open again and ask you to select an account to sign in to Google.
Zapier will ask for access to your Google account. You can review which permissions you have given by reading from the list. If you want to confirm, you can continue by pressing the ‘Allow’ button.
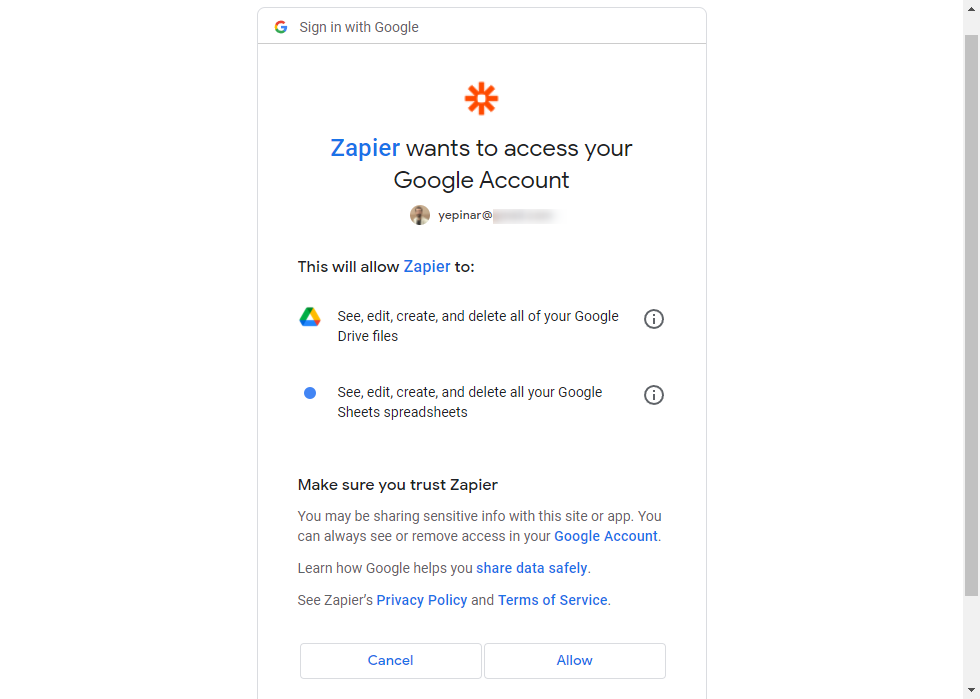
Your Google account is now also successfully connected.
After selecting the Google account from the list, you will be asked to select the drive account where the spreadsheet is located and the worksheet in the spreadsheet.
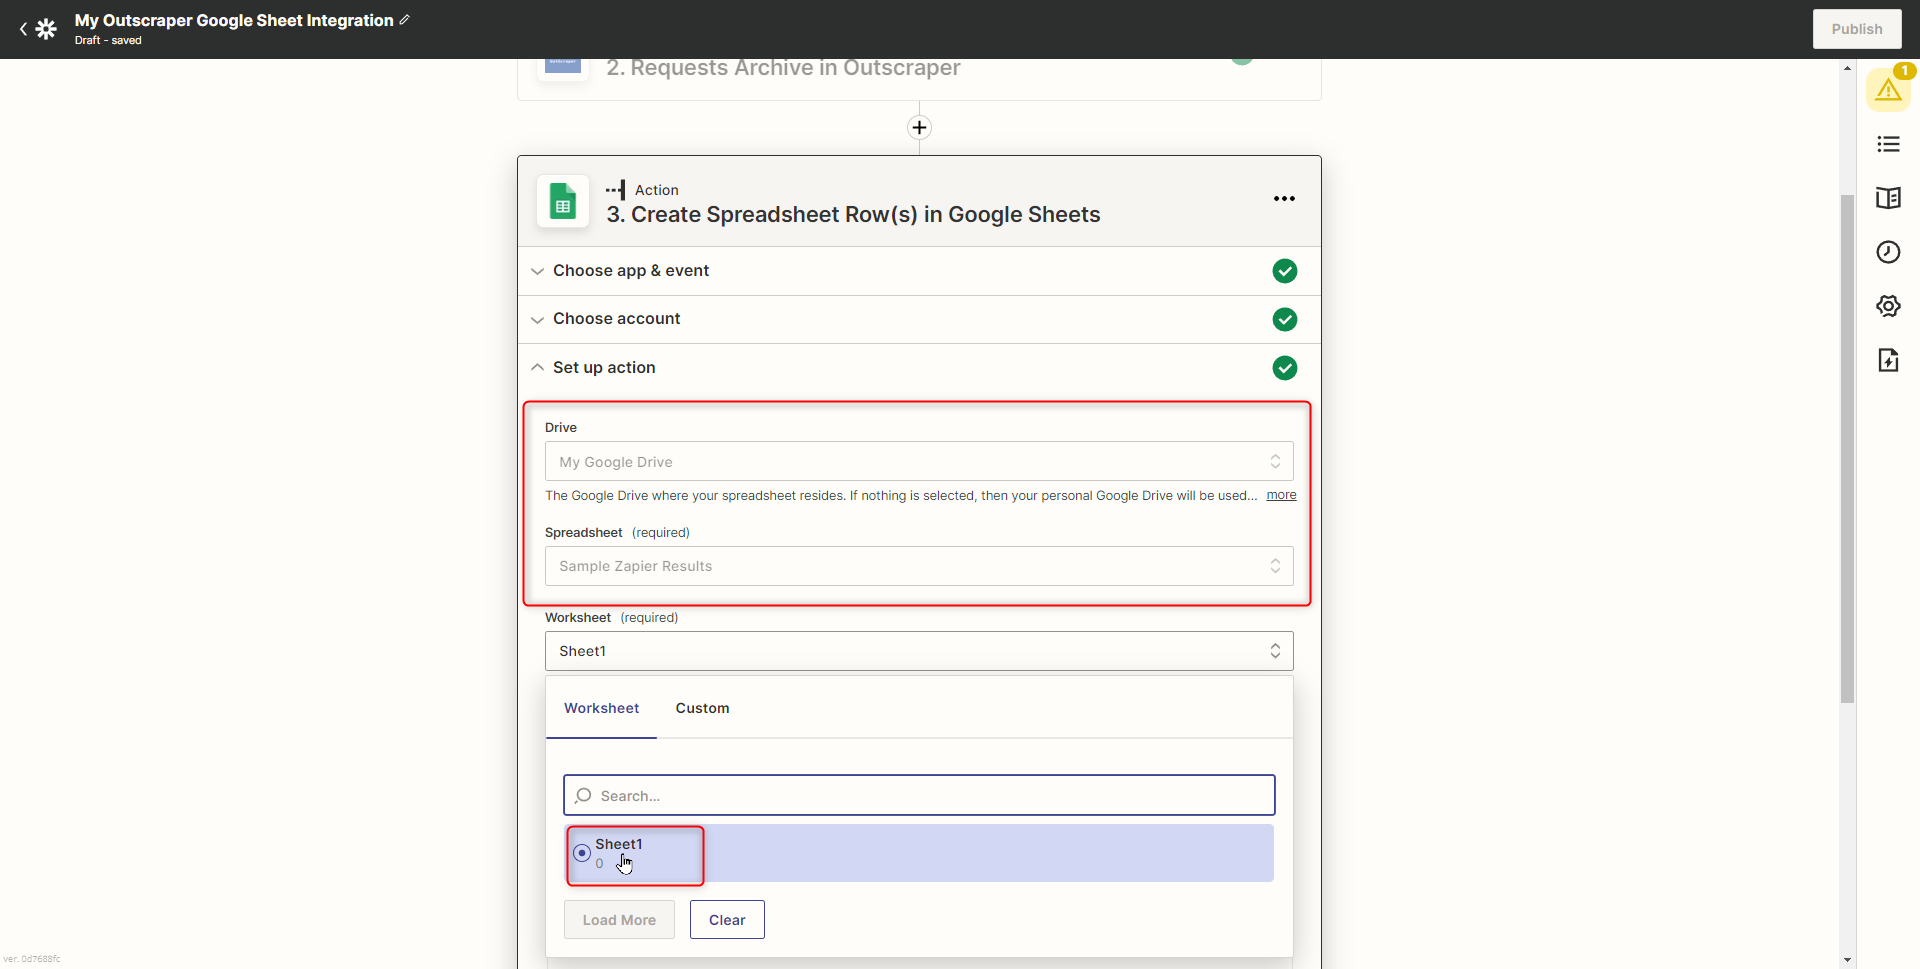
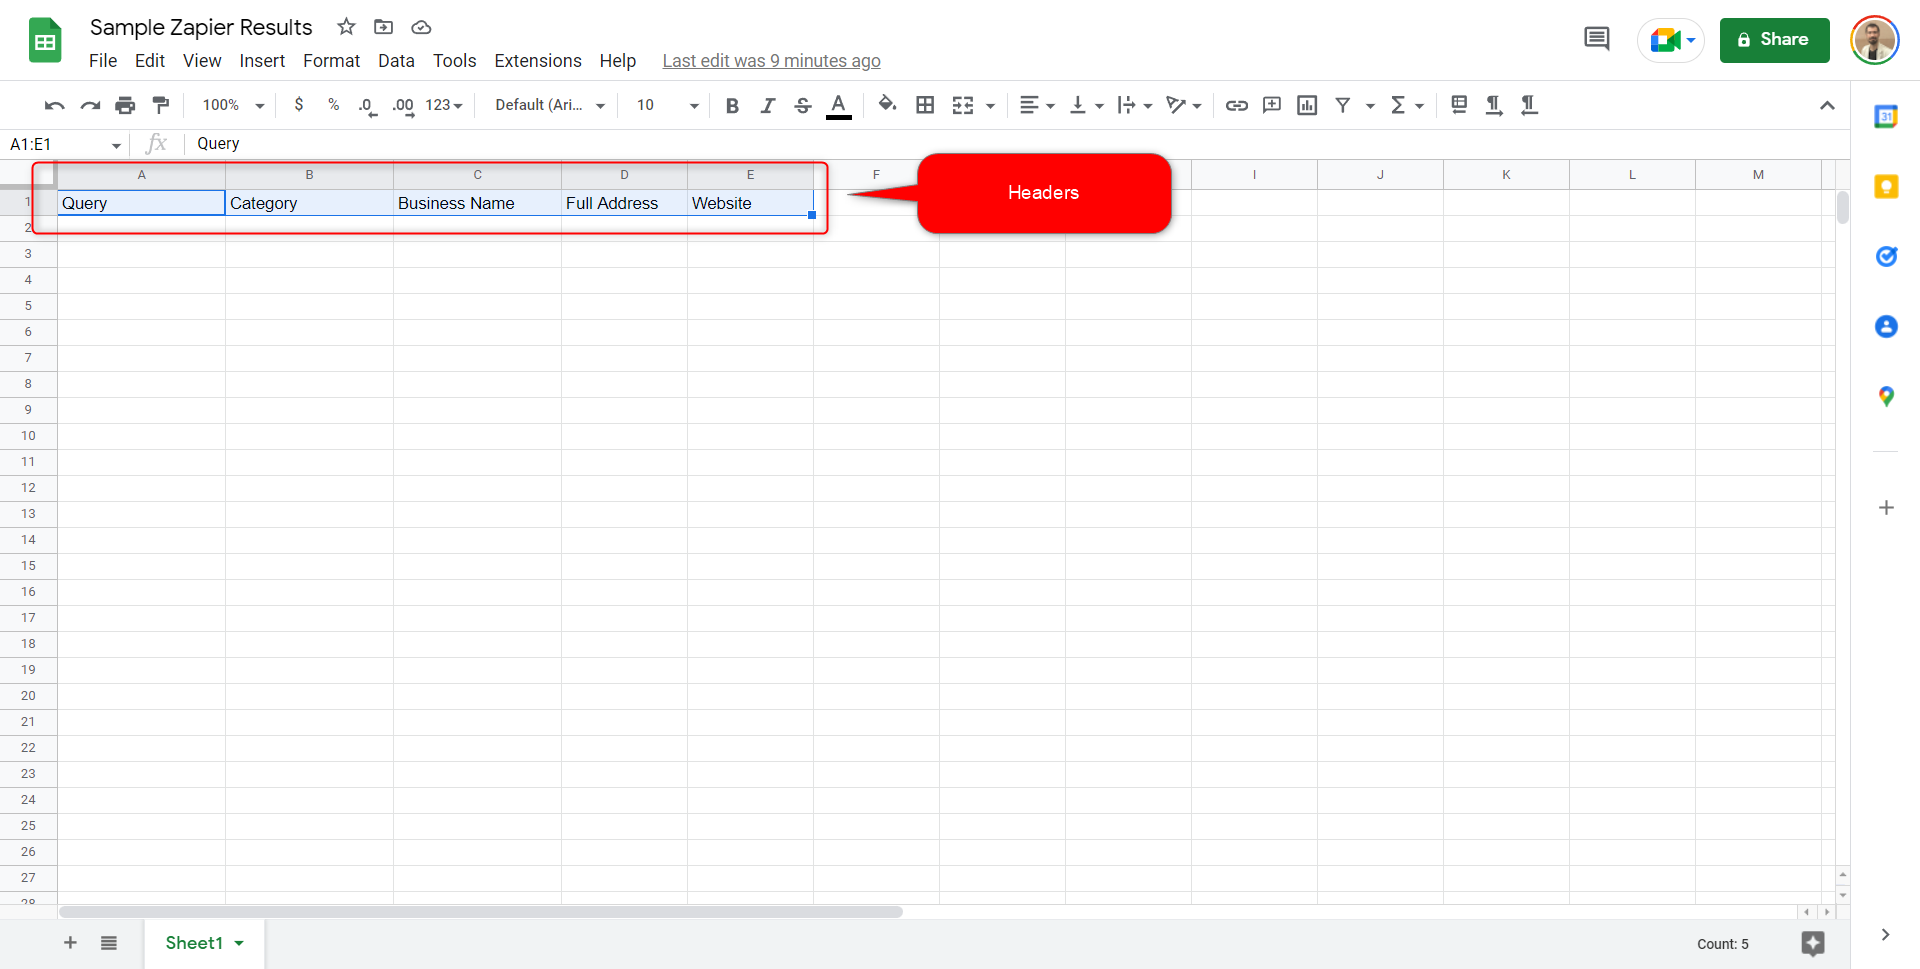
A spreadsheet must be created in Google Drive to use it on workflows, such as the “Sample Zapier Results” spreadsheet. Besides, you need to write headers for the data fields you want listed in the blank worksheet.
The headers here will appear automatically in the rows section. The headers here will appear automatically in the rows section. Thus, the desired data columns from the result file can be defined in these fields.
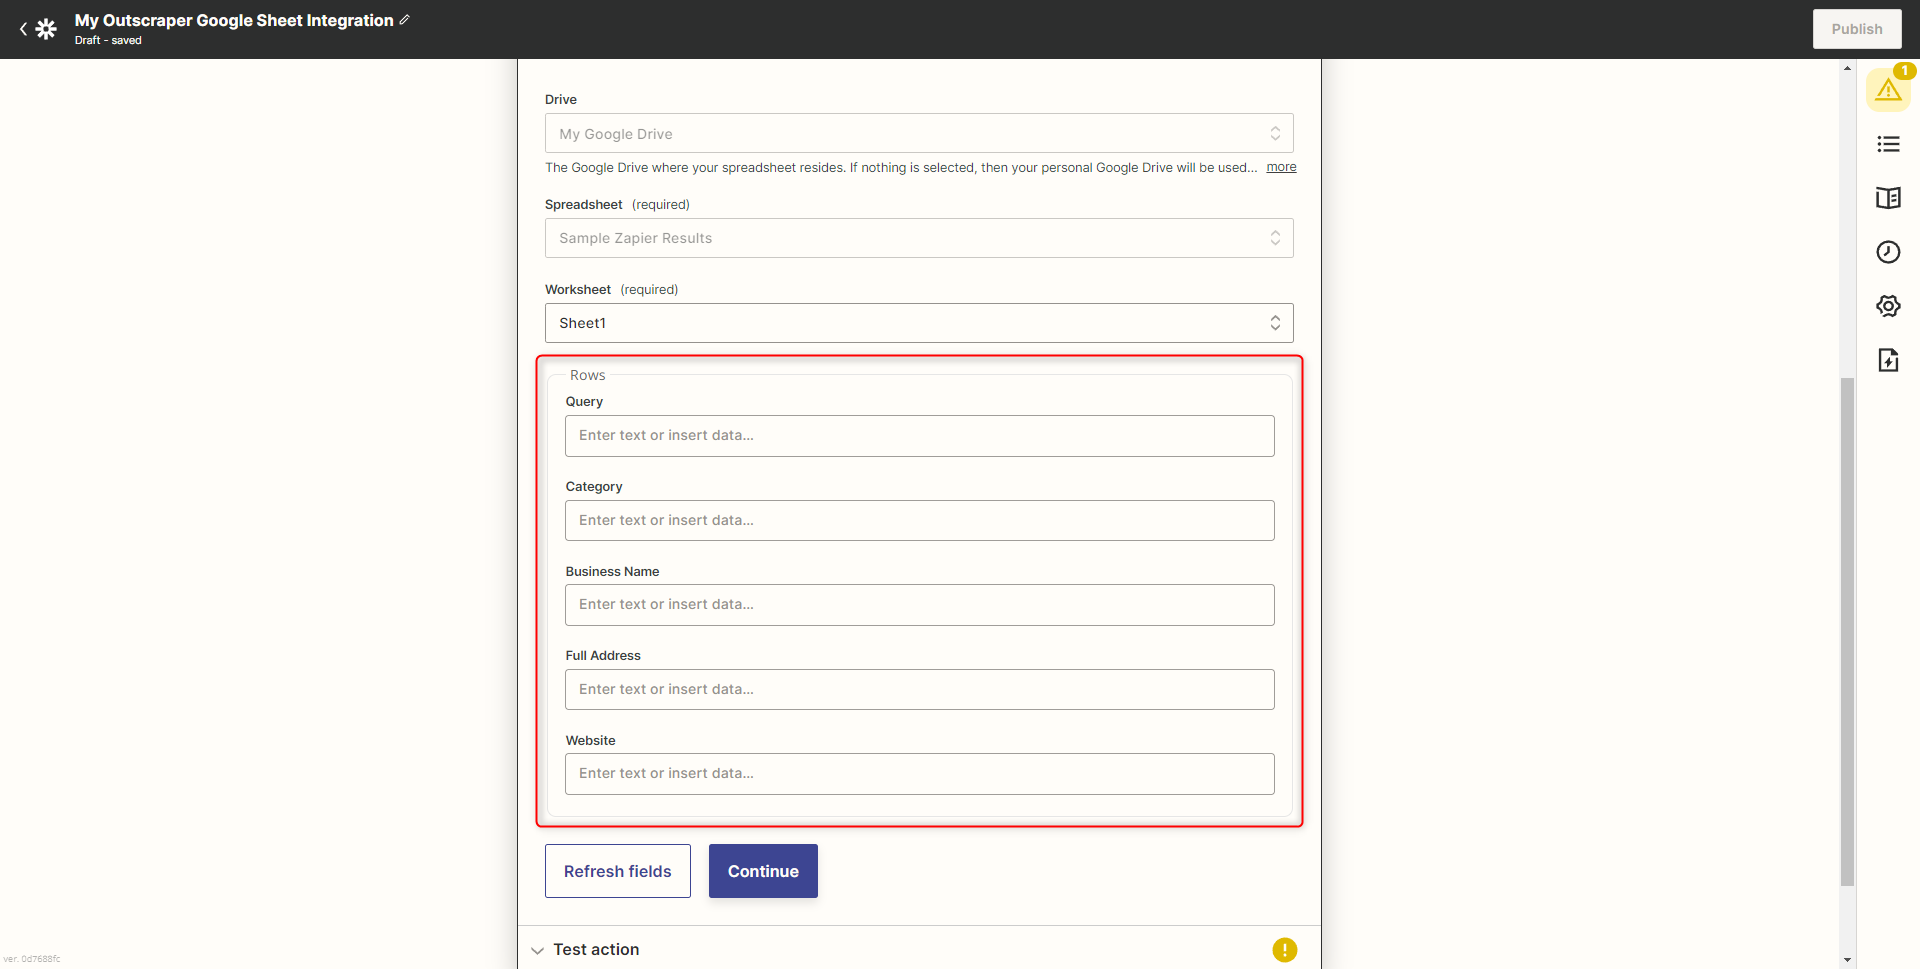
First, click the “Requests Archive in Outscraper” list to select the desired data for the rows, and then click the “show all options” button to open the entire list.
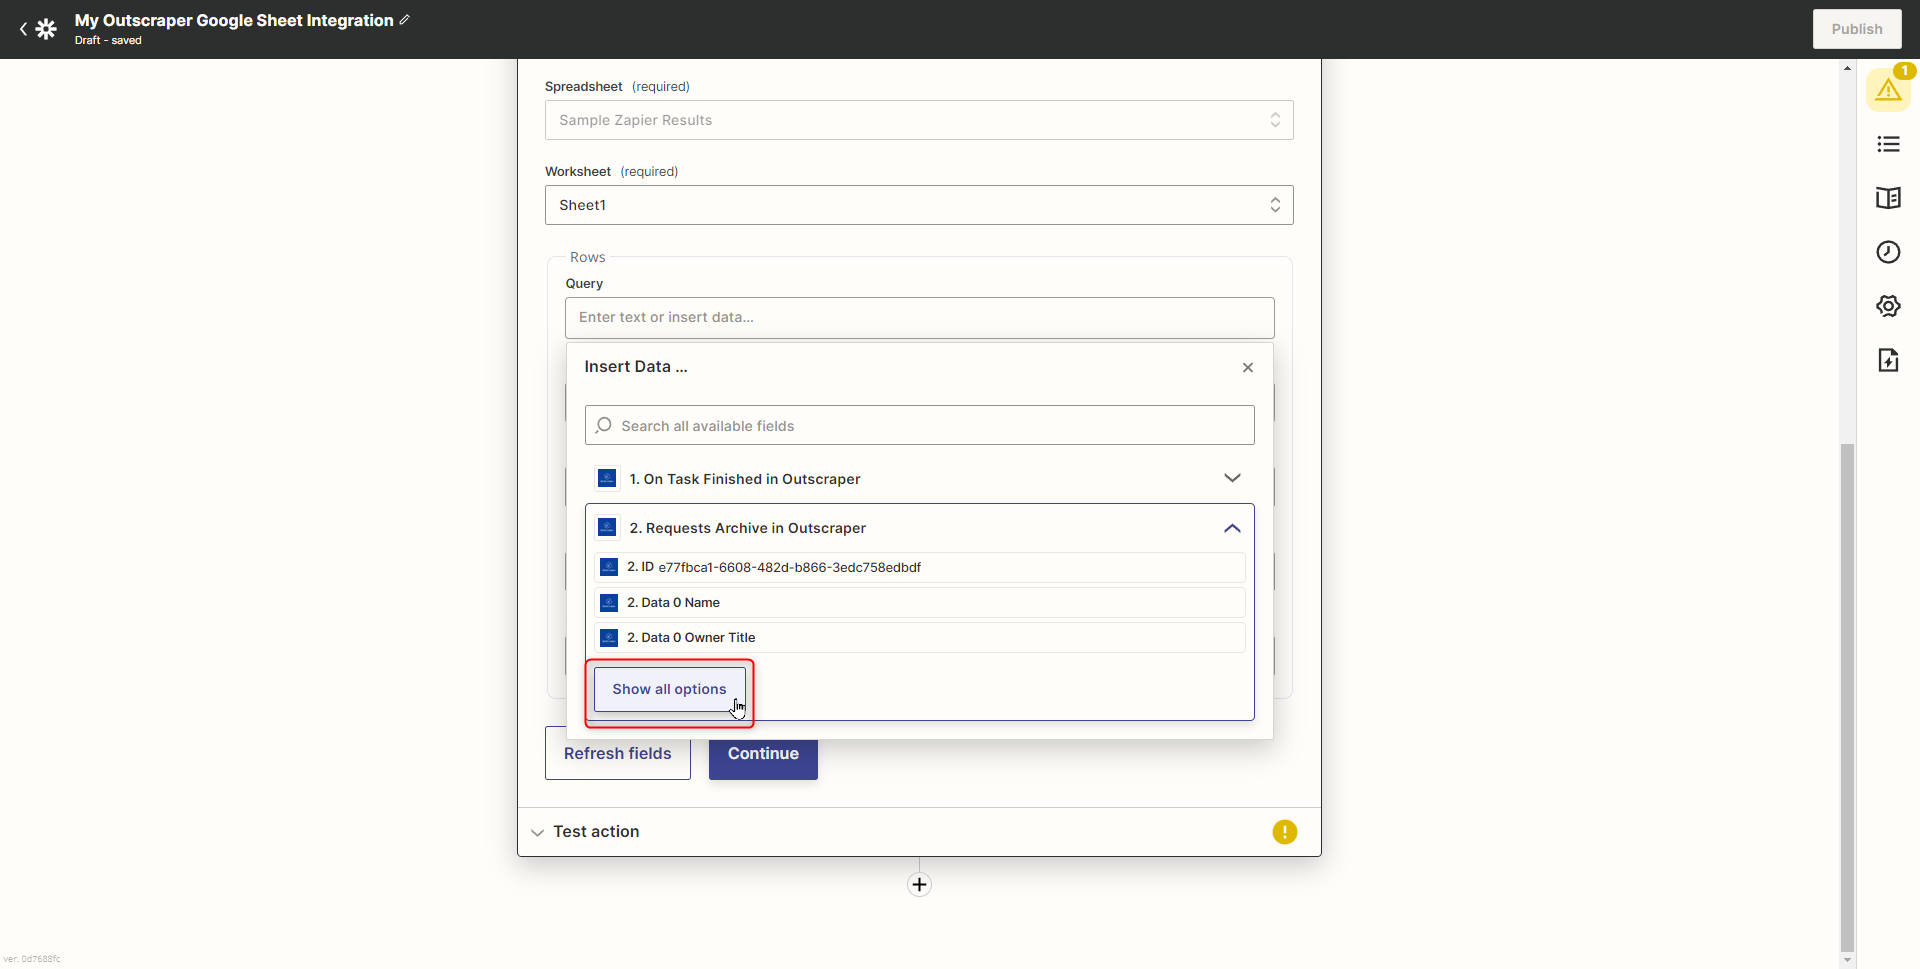
In the drop-down list, select the data that matches the header. Although there are many “Data Query” in the list, choose the option that shows the preview text of the results next to it.
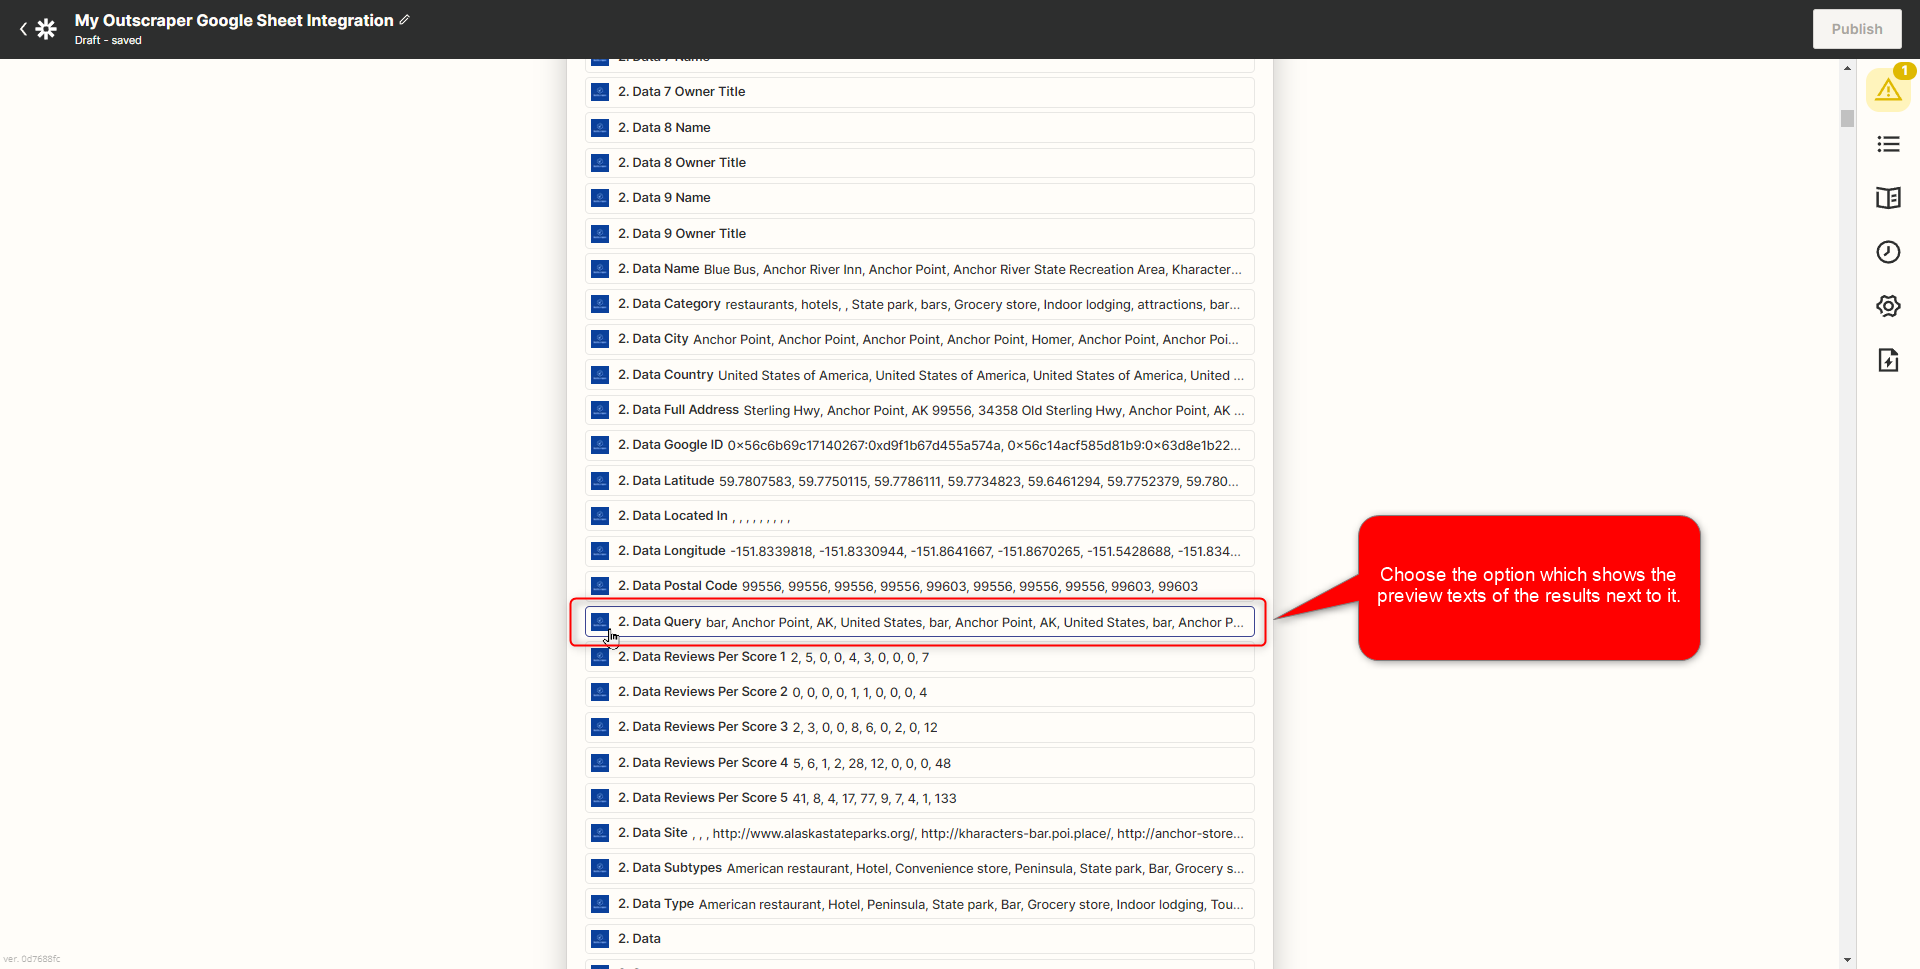
Choose the correct options for all rows in the same way.

After proceeding with the Continue button, a preview screen will appear. You can review the data once again on this screen.
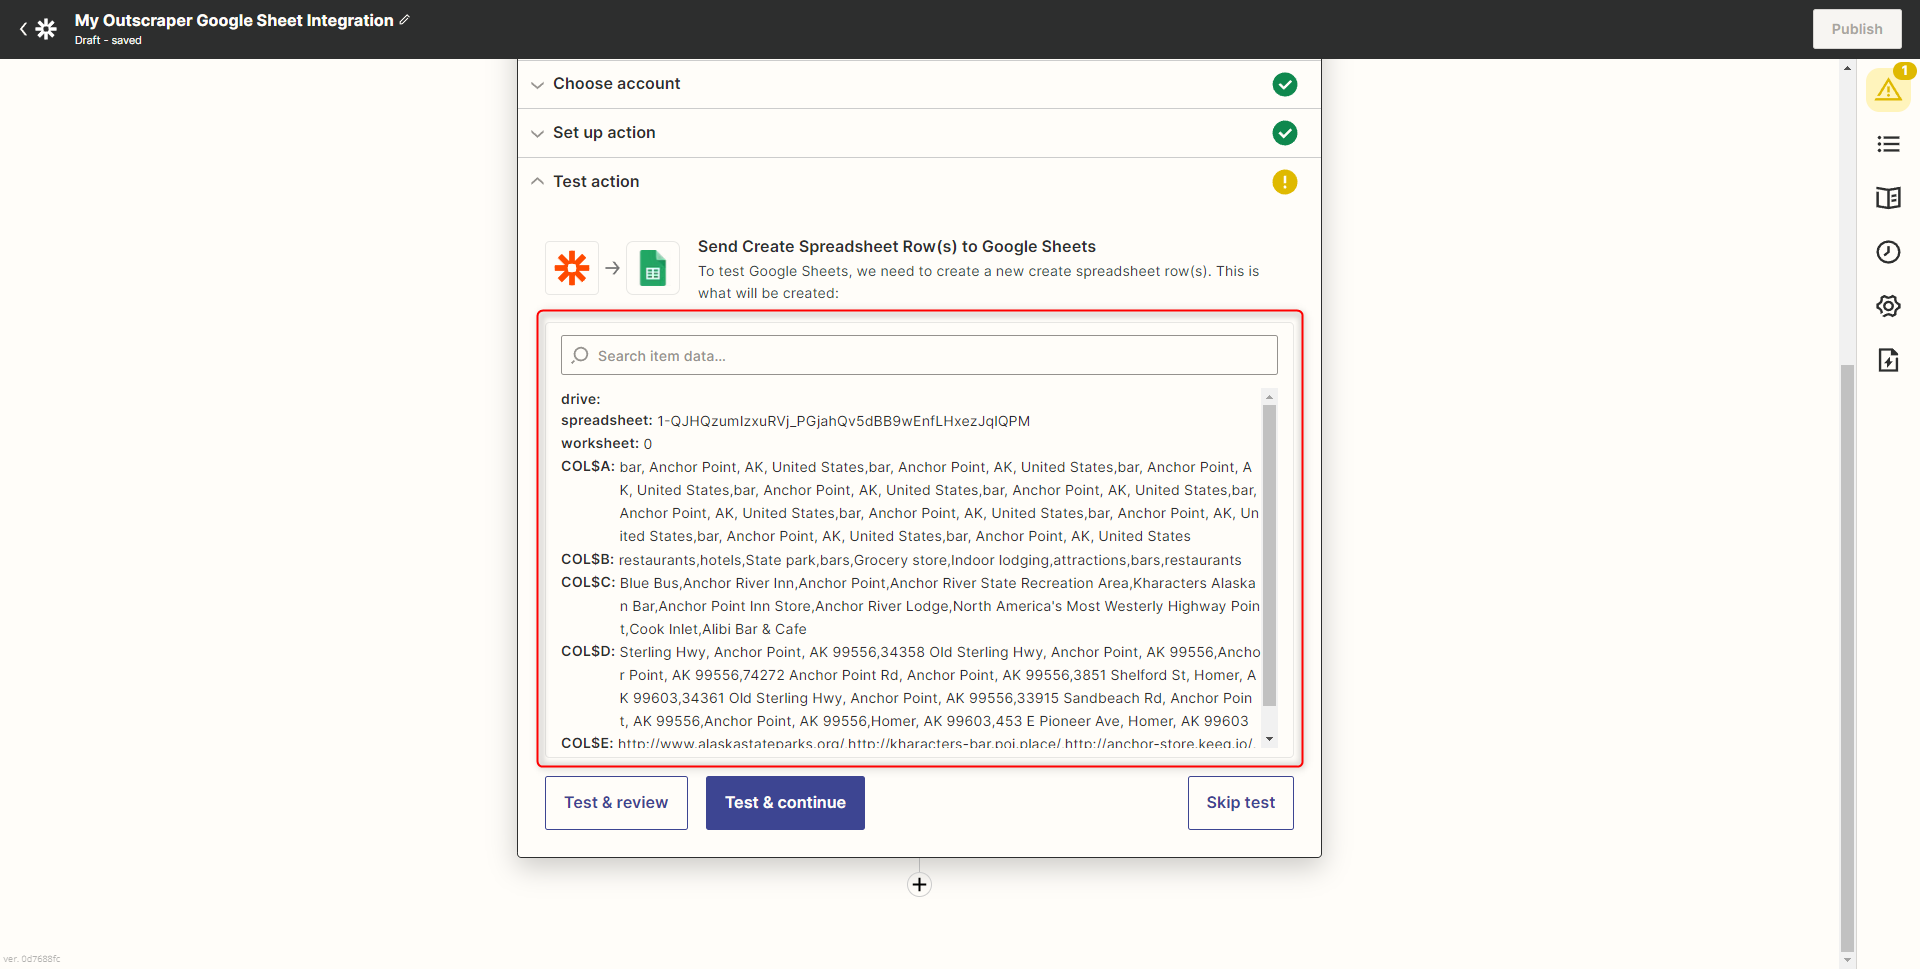
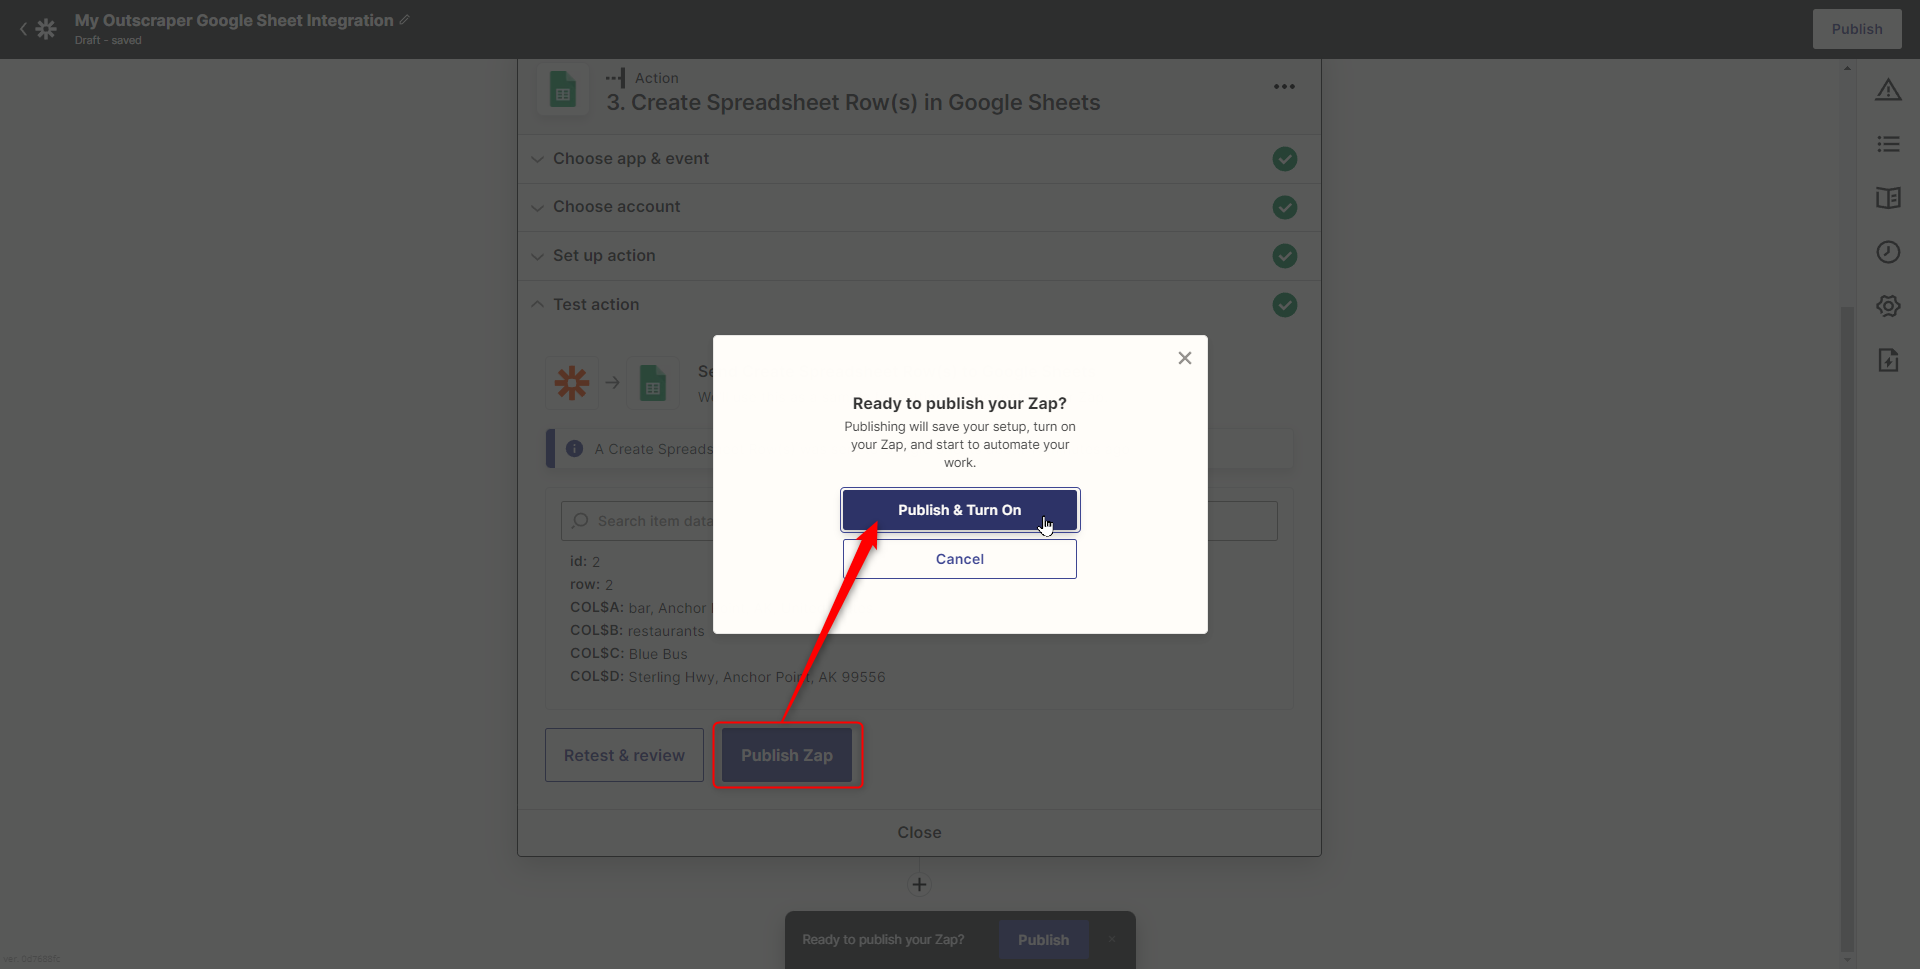
Please continue the process with the Test & Review button. Zapier will give feedback: “A Create Spreadsheet Row(s) was sent to Google Sheets about 31 seconds ago.”
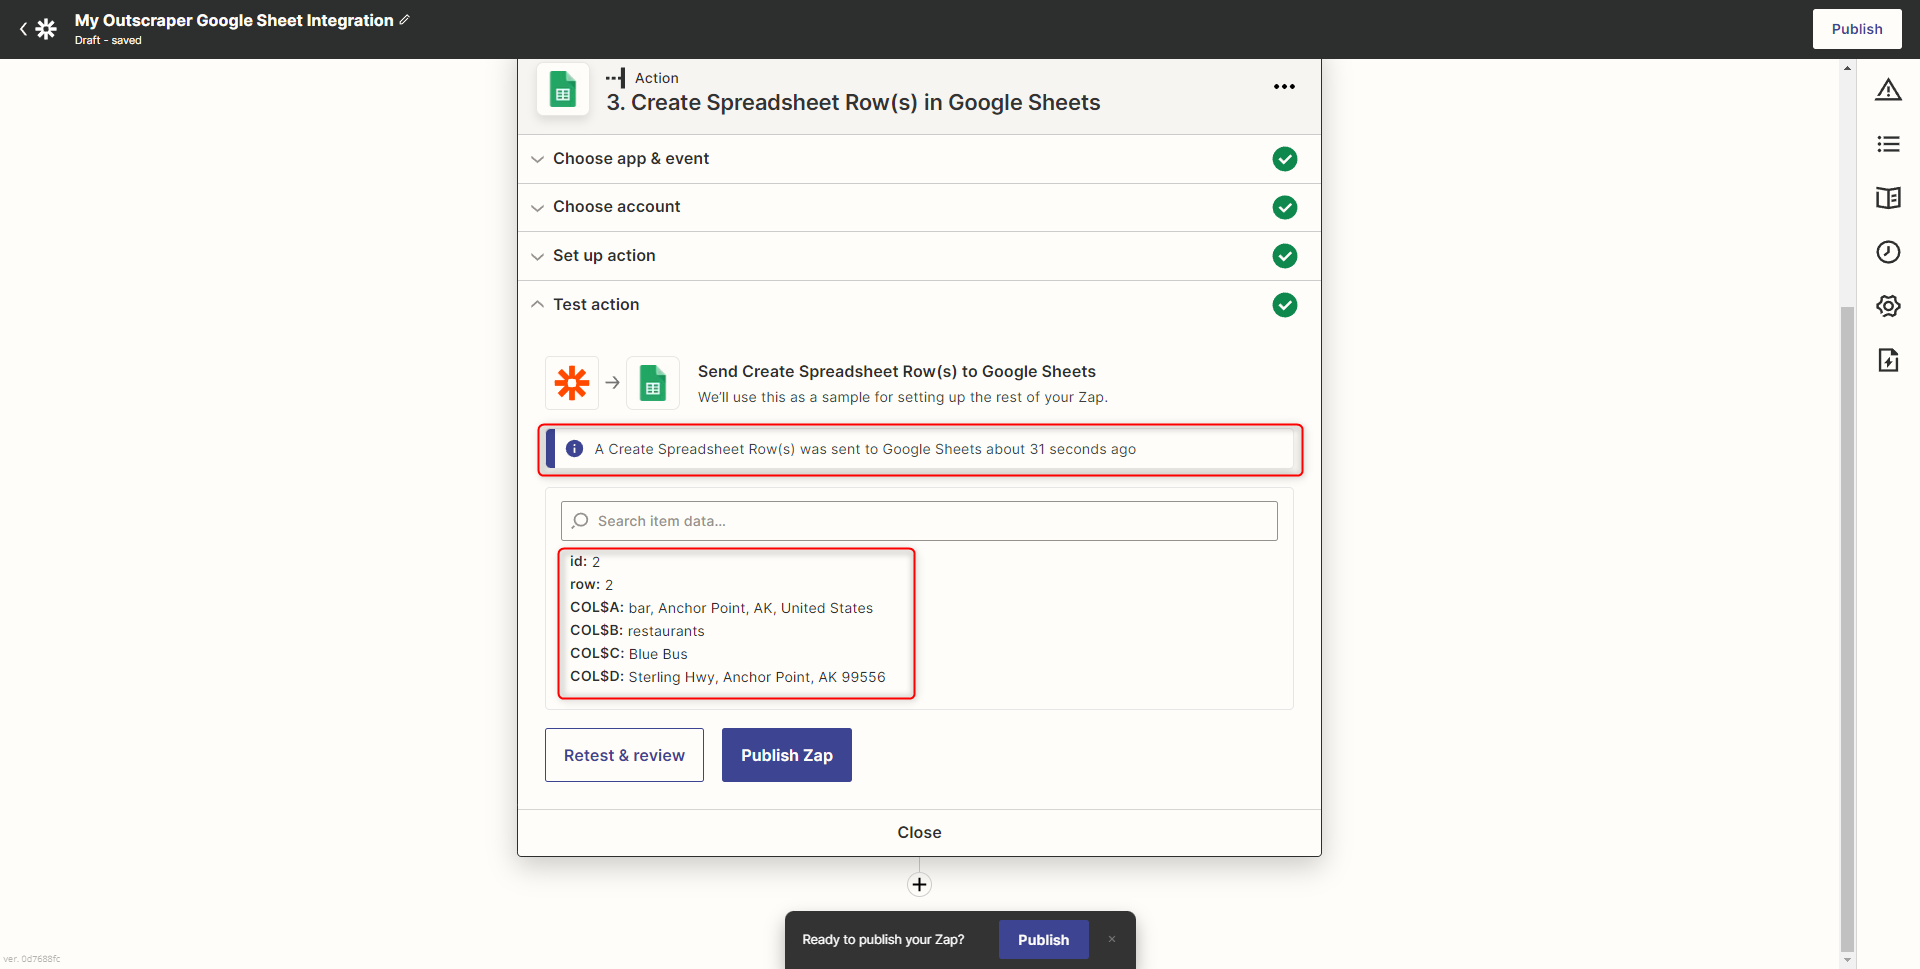
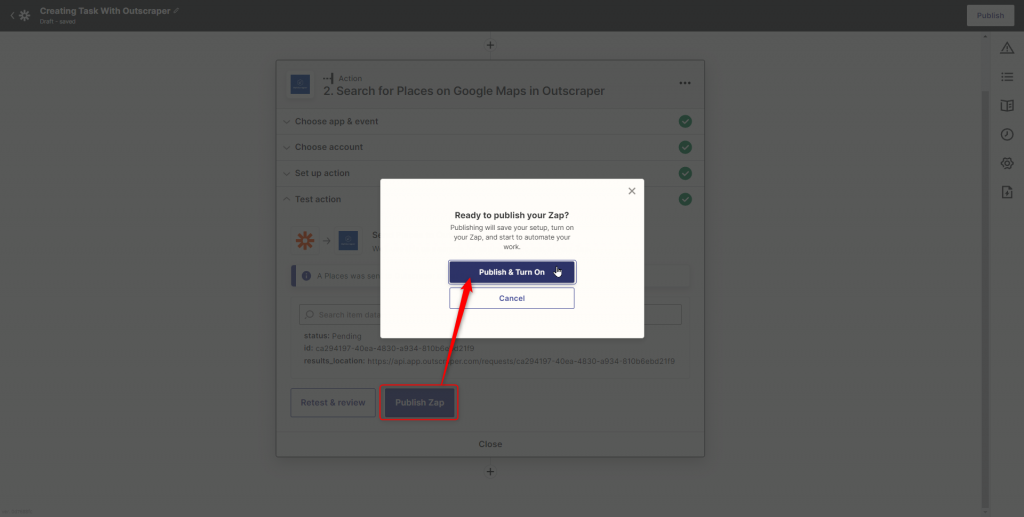
Check the spreadsheet for the test result. If you see the results of the task on the spreadsheet, everything is fine and Zap is ready to be published. You can finalize the process by pressing the Publish Zap button.

Now Zap is ready to be published. Click the “Publish & Turn On” button and publish the configured Zap.
Publishing will save your configuration and start automating your work. Thus, the result of each task created will be automatically transferred to the spreadsheet.
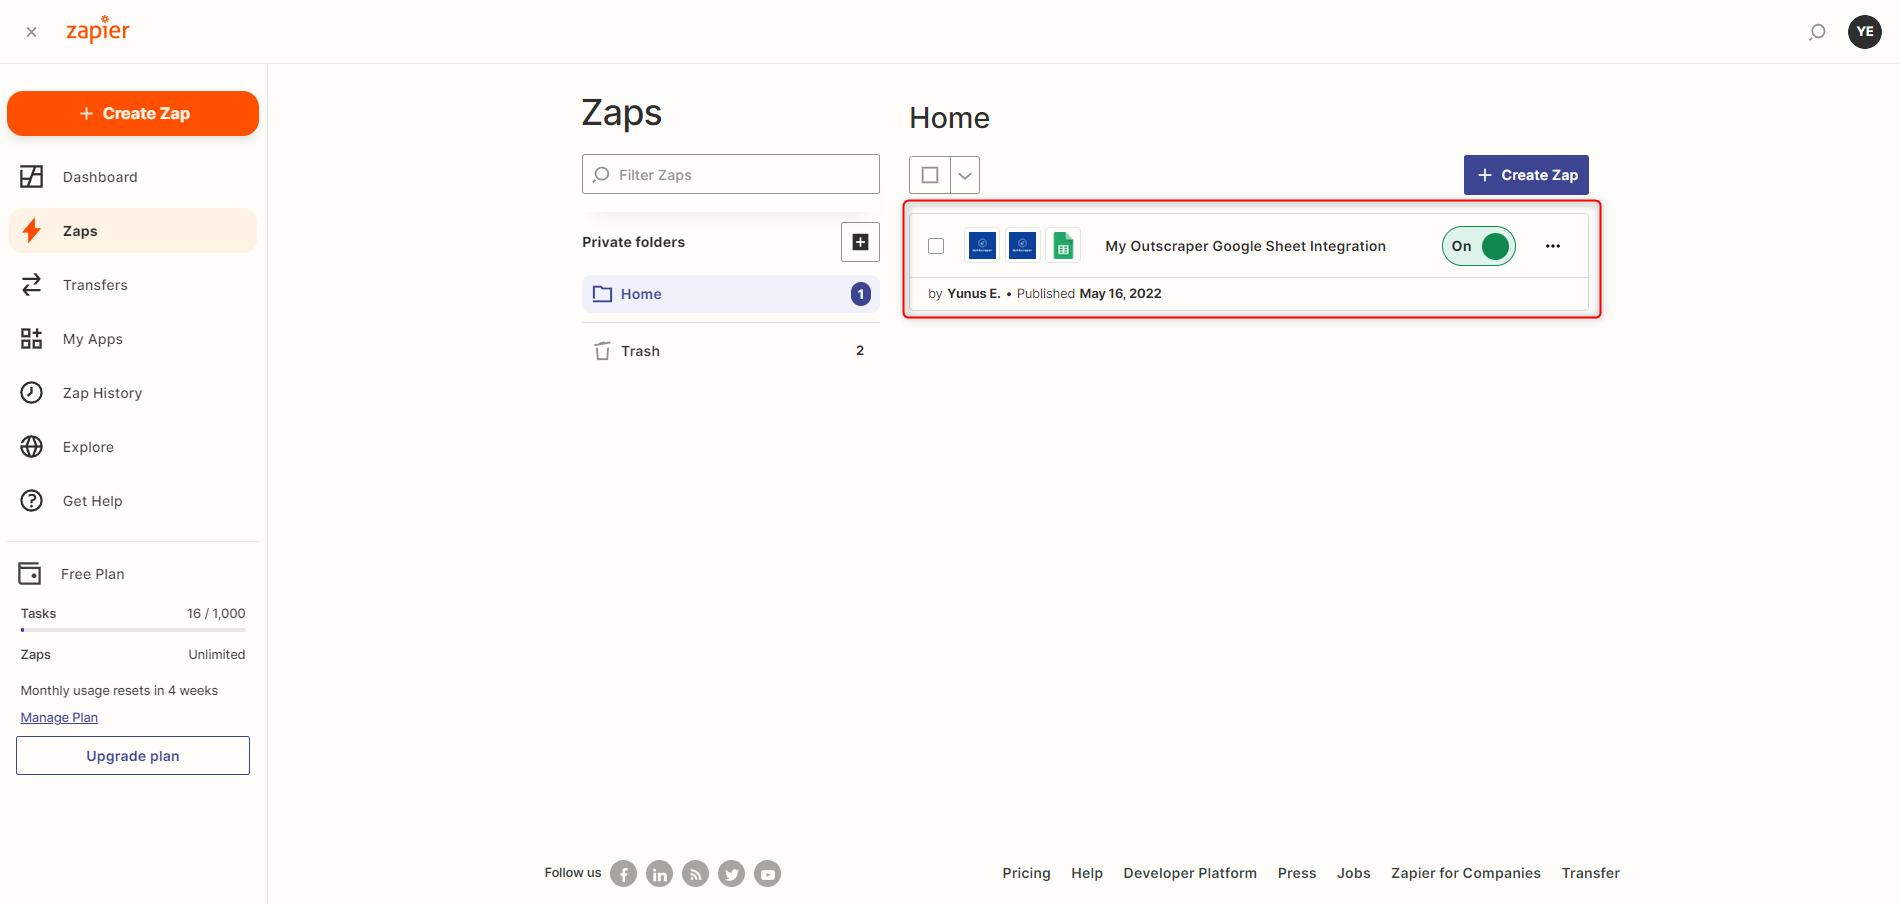
Zapier integration is ready and on now. You can use alternative ways to create tasks in Outscraper. A task can be created in Outscraper Google Maps Data Scraper and Zapier triggered in each differents ways.
Creating Tasks on Outscraper
There are two different ways to create a task with Outscraper Google Maps Data Scraper. One is to create a task with the UI in the Outscraper App Dashboard or use the Zapier action “Search for Places on Google Maps”.
Creating Tasks With Using Outscraper UI
Google Maps Data Scraper service can be accessed by selecting the Maps service under Google Services on the Outscraper App Dashboard. The task can be created by specifying the desired parameters in the user interface.
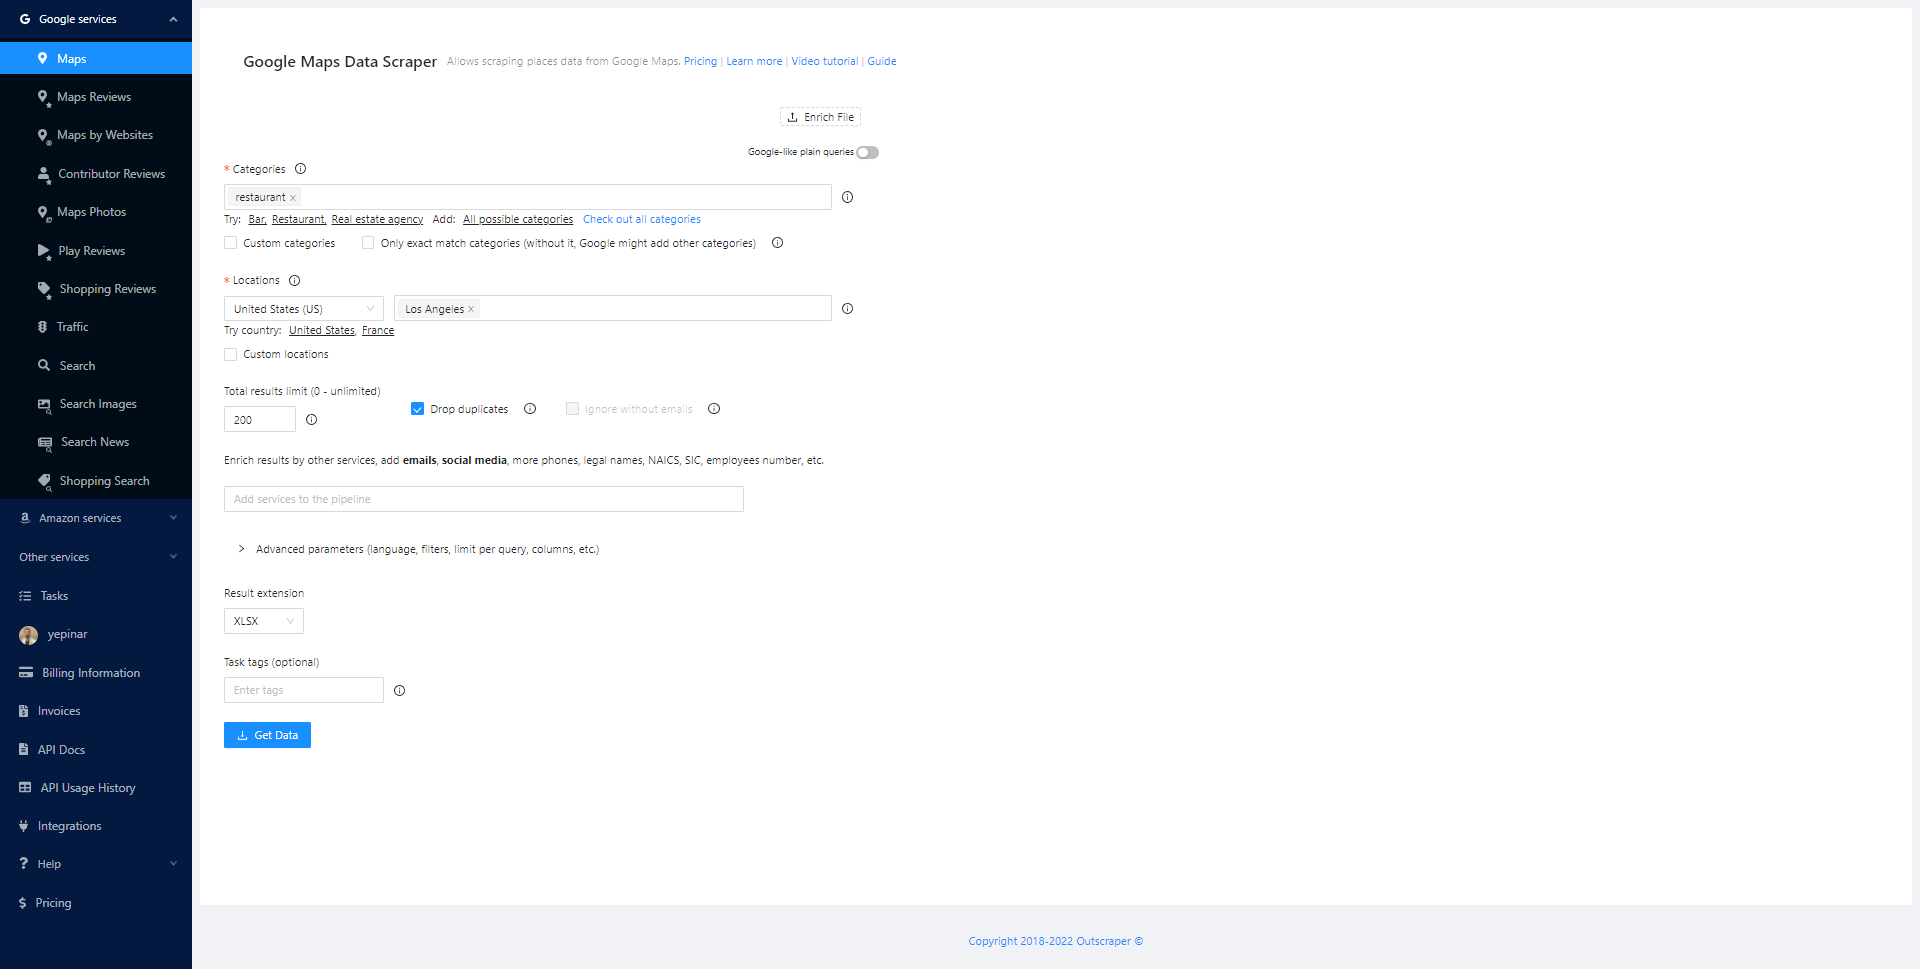
A detailed tutorial on how to create a Google Maps scraping task with the UI can be found here.
Creating Tasks With Using Zapier Action
It is possible to create a task with a Zapier workflow, just like archiving the results. There is no ready workflow for this for now. You have to set up integration and workflow manually.
Integration Setup
You can create a new workflow with the “+ Create Zap” button on the home page of your Zapier dashboard.
Trigger: New Spreadsheet Row in Google Sheets
A Google Sheet trigger will be selected as the first trigger. The workflow will run as soon as any data is added to the spreadsheet with the “New Spreadsheet Row in Google Sheets” trigger. This data scraper will determine the query for Google Maps Data Scraper.
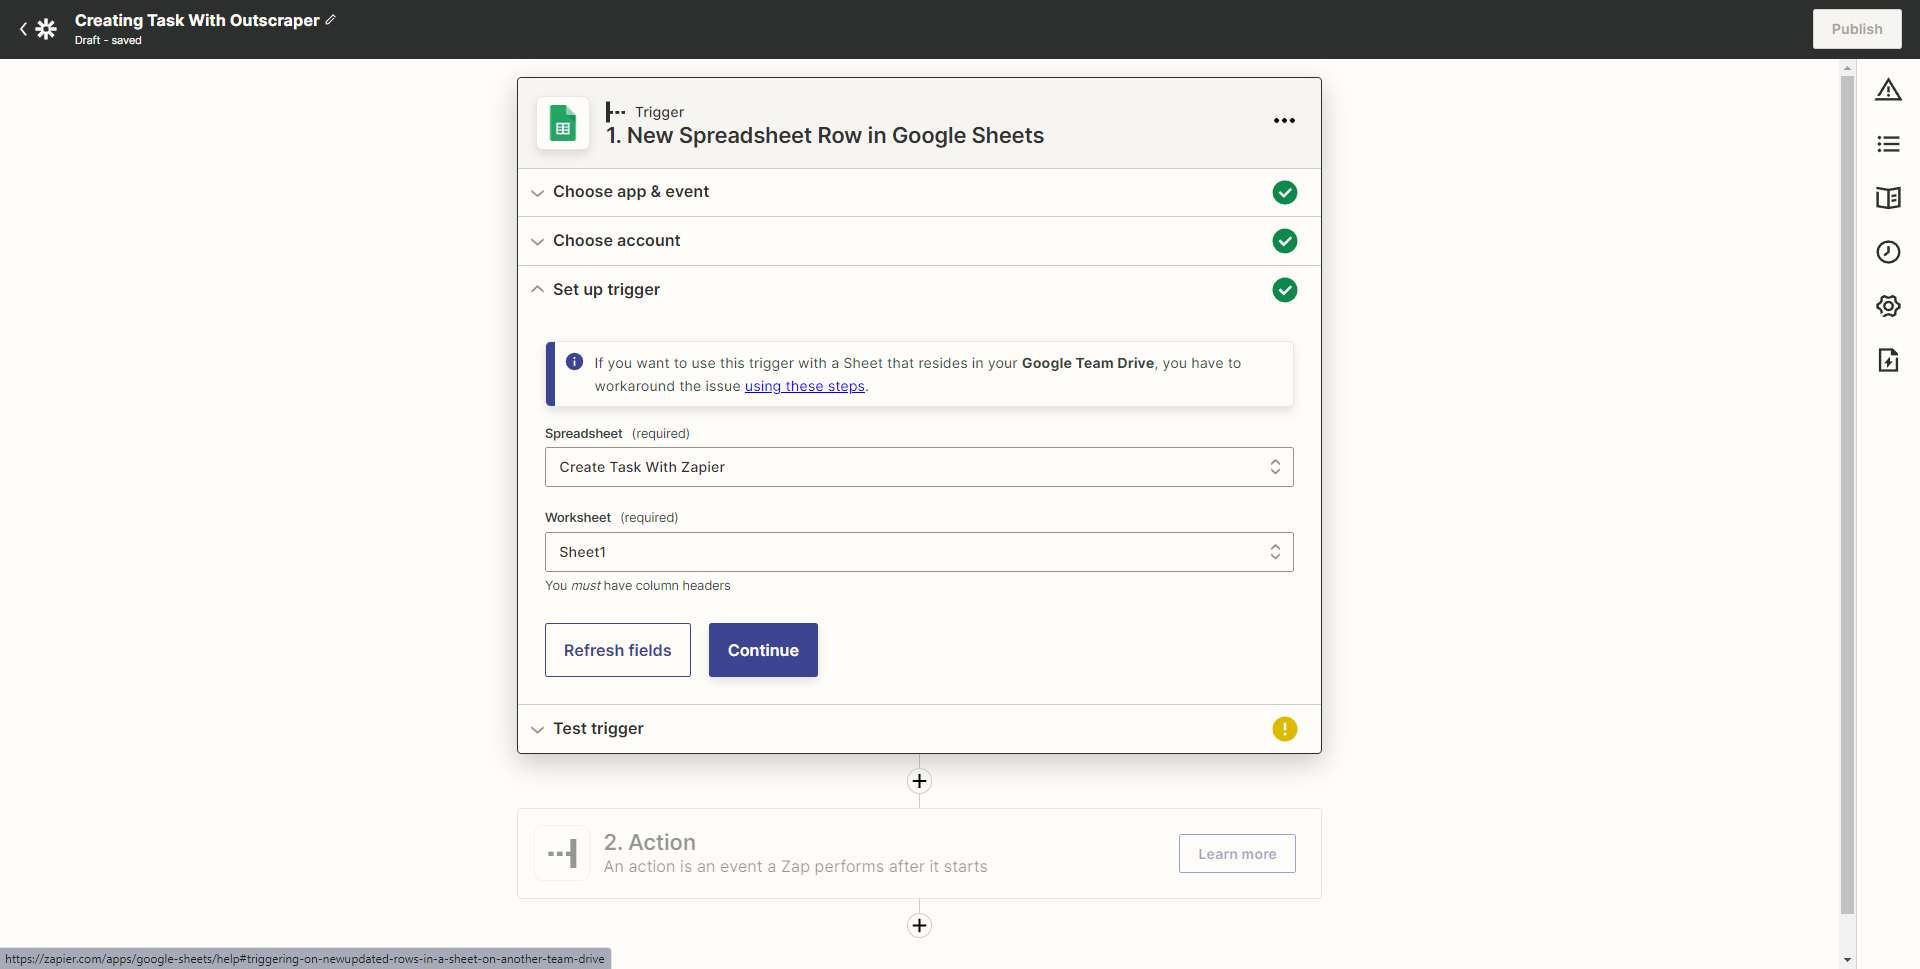
It will ask your Google Sheets account to select the spreadsheet again. Please select your account and spreadsheet in these steps. A header is required for rows in the spreadsheet.
“We found a spreadsheet row!” message will be shown if your test is successful.

Now you can proceed to the “action” setup.
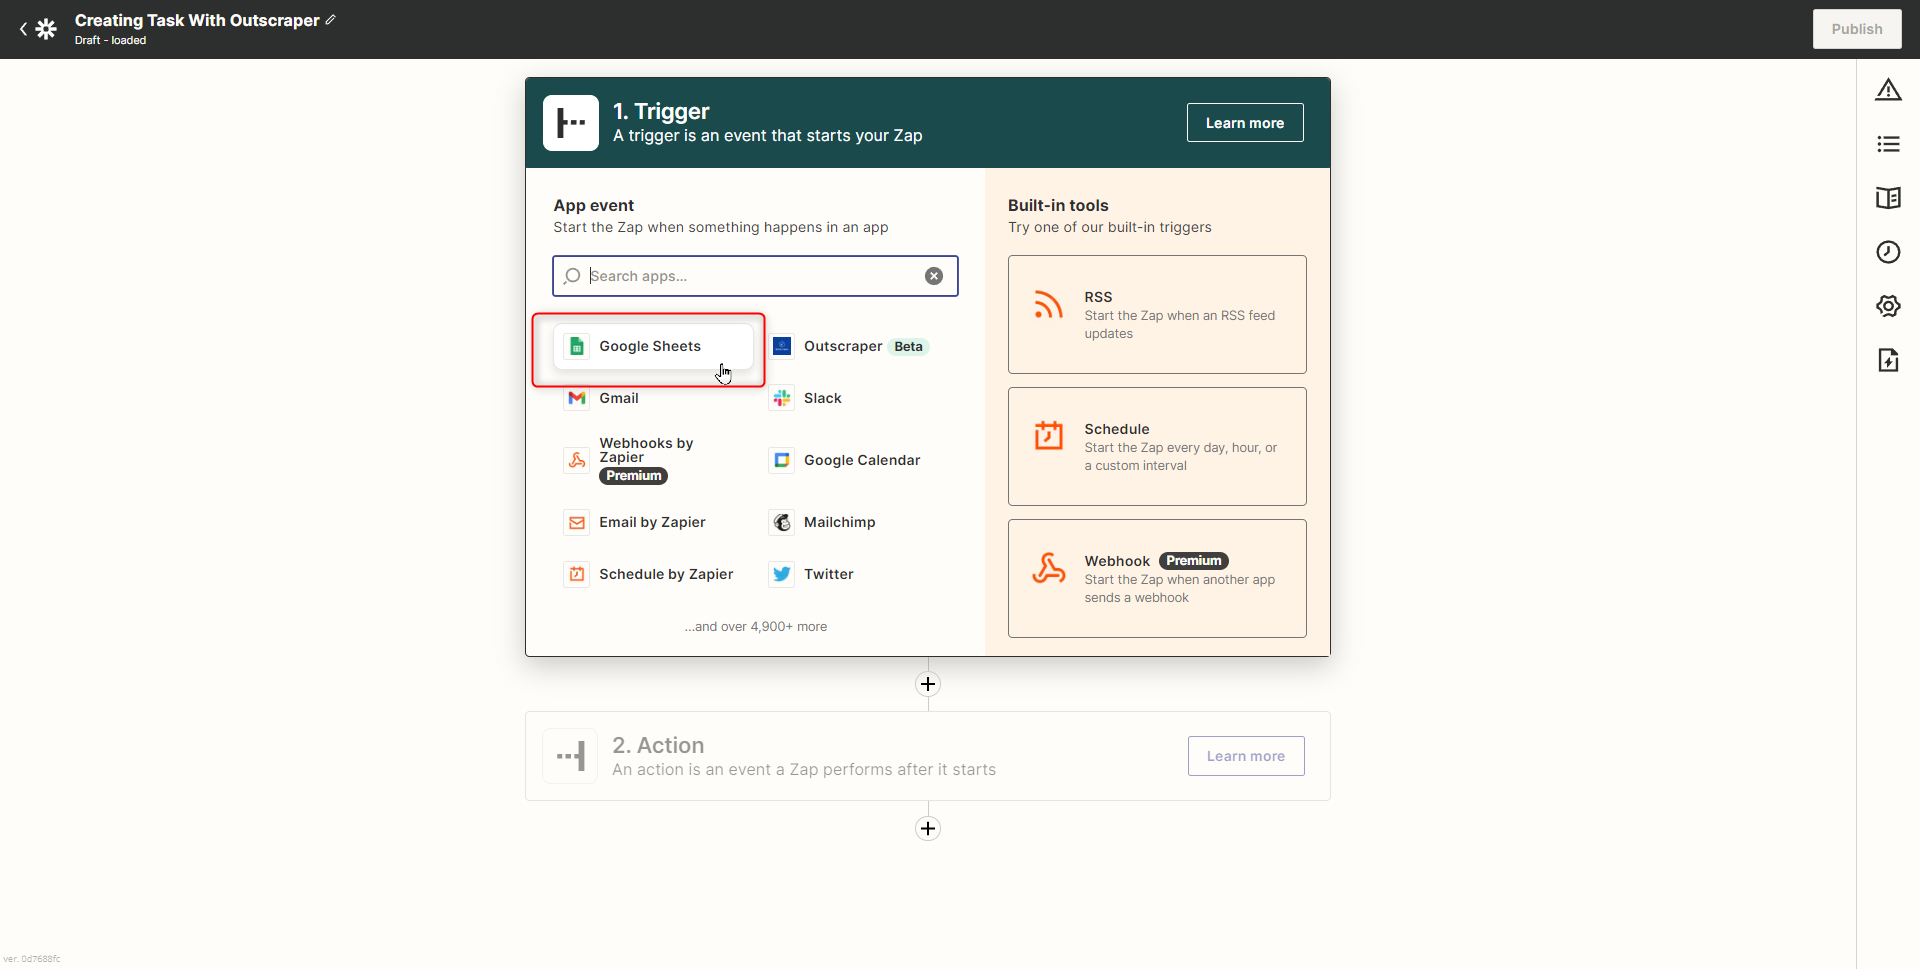
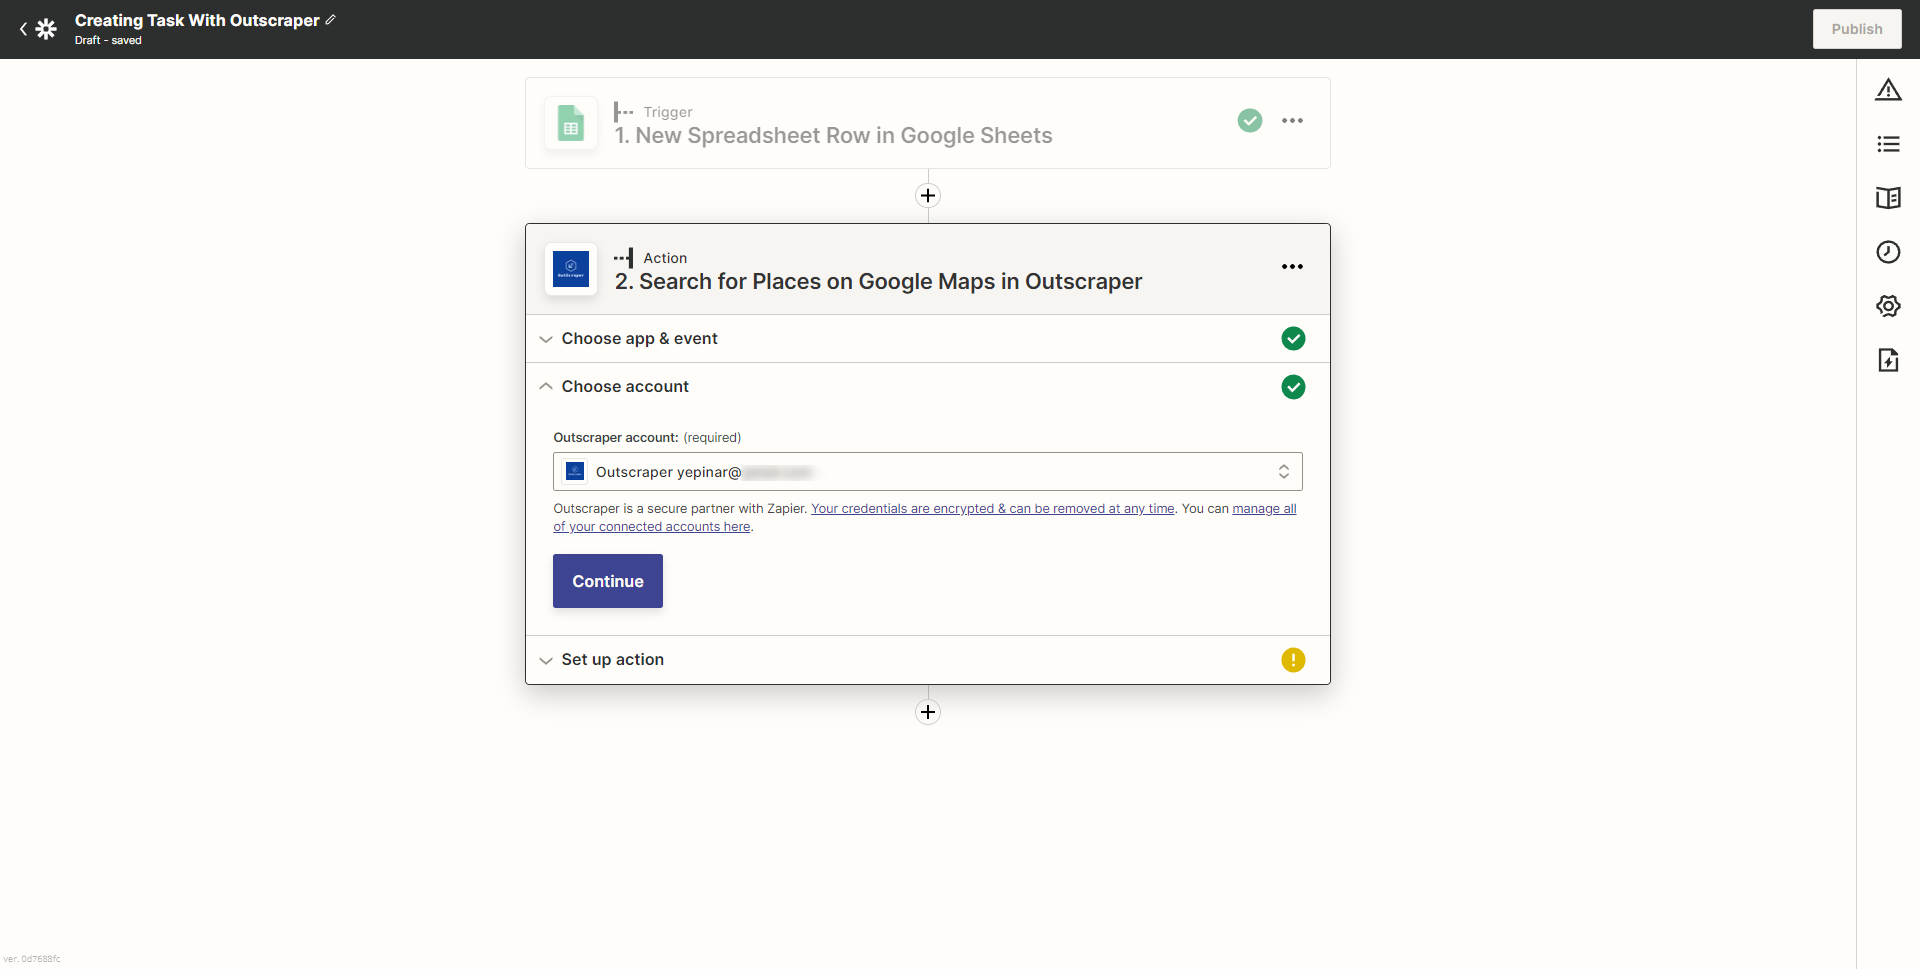
Action: Search for Places on Google Maps in Outscraper
Select Outscraper from the drop-down list to select “Action”.

In the next step, 2 Outscraper actions will appear in the list. Select the action “Search for Places on Google Maps in Outscraper” and continue.

Select your Outscraper account and continue to the next step.
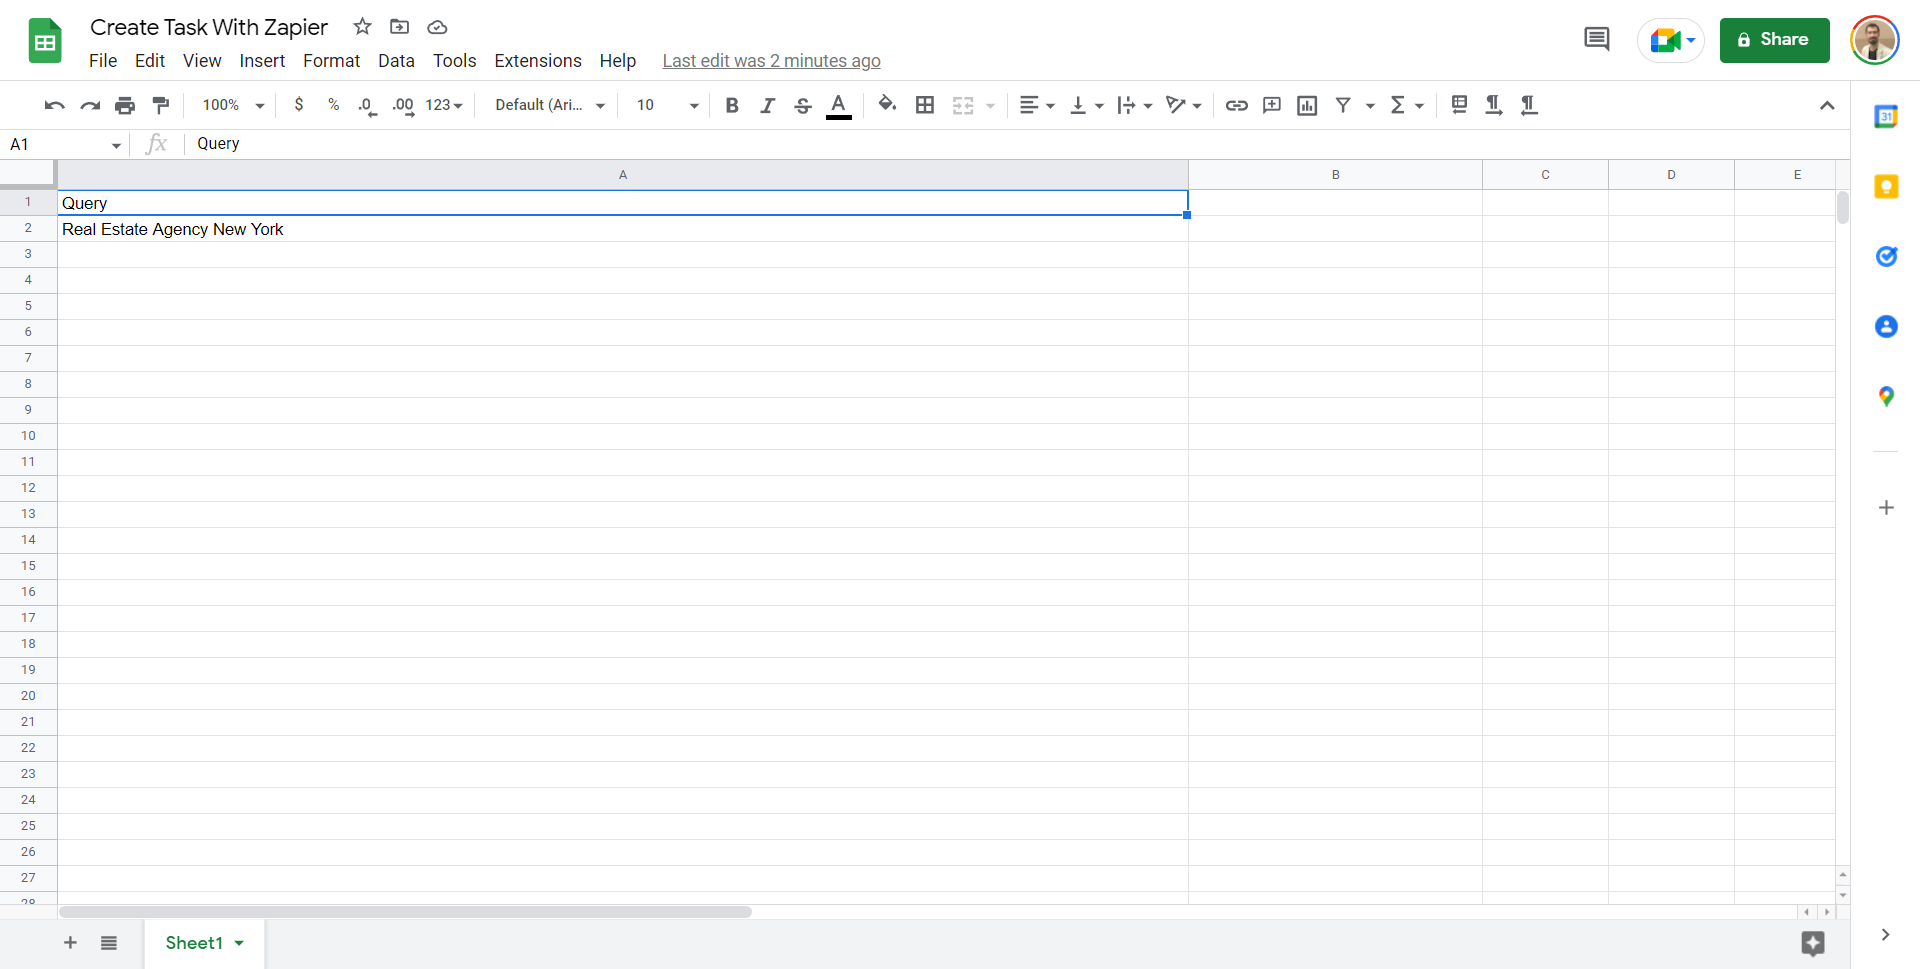
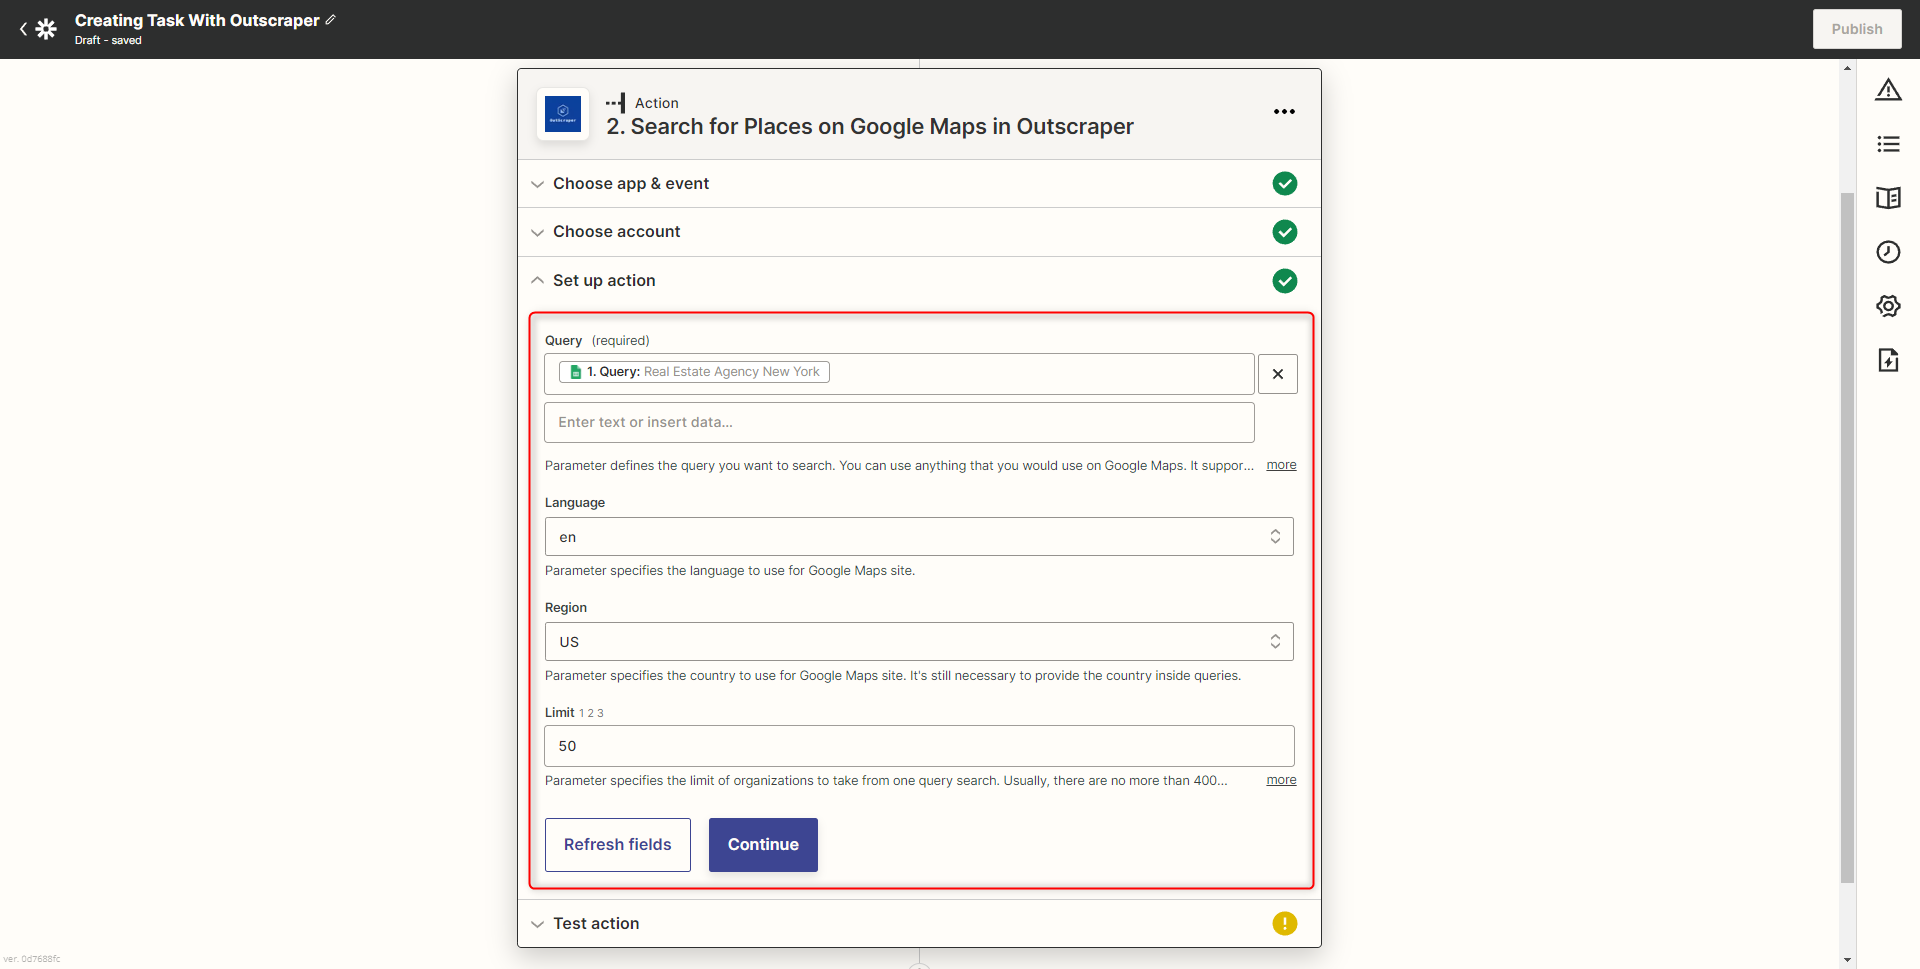
Choose your header name from the drop-down list. Query preview shown in the line: “Real Estate Agency New York”
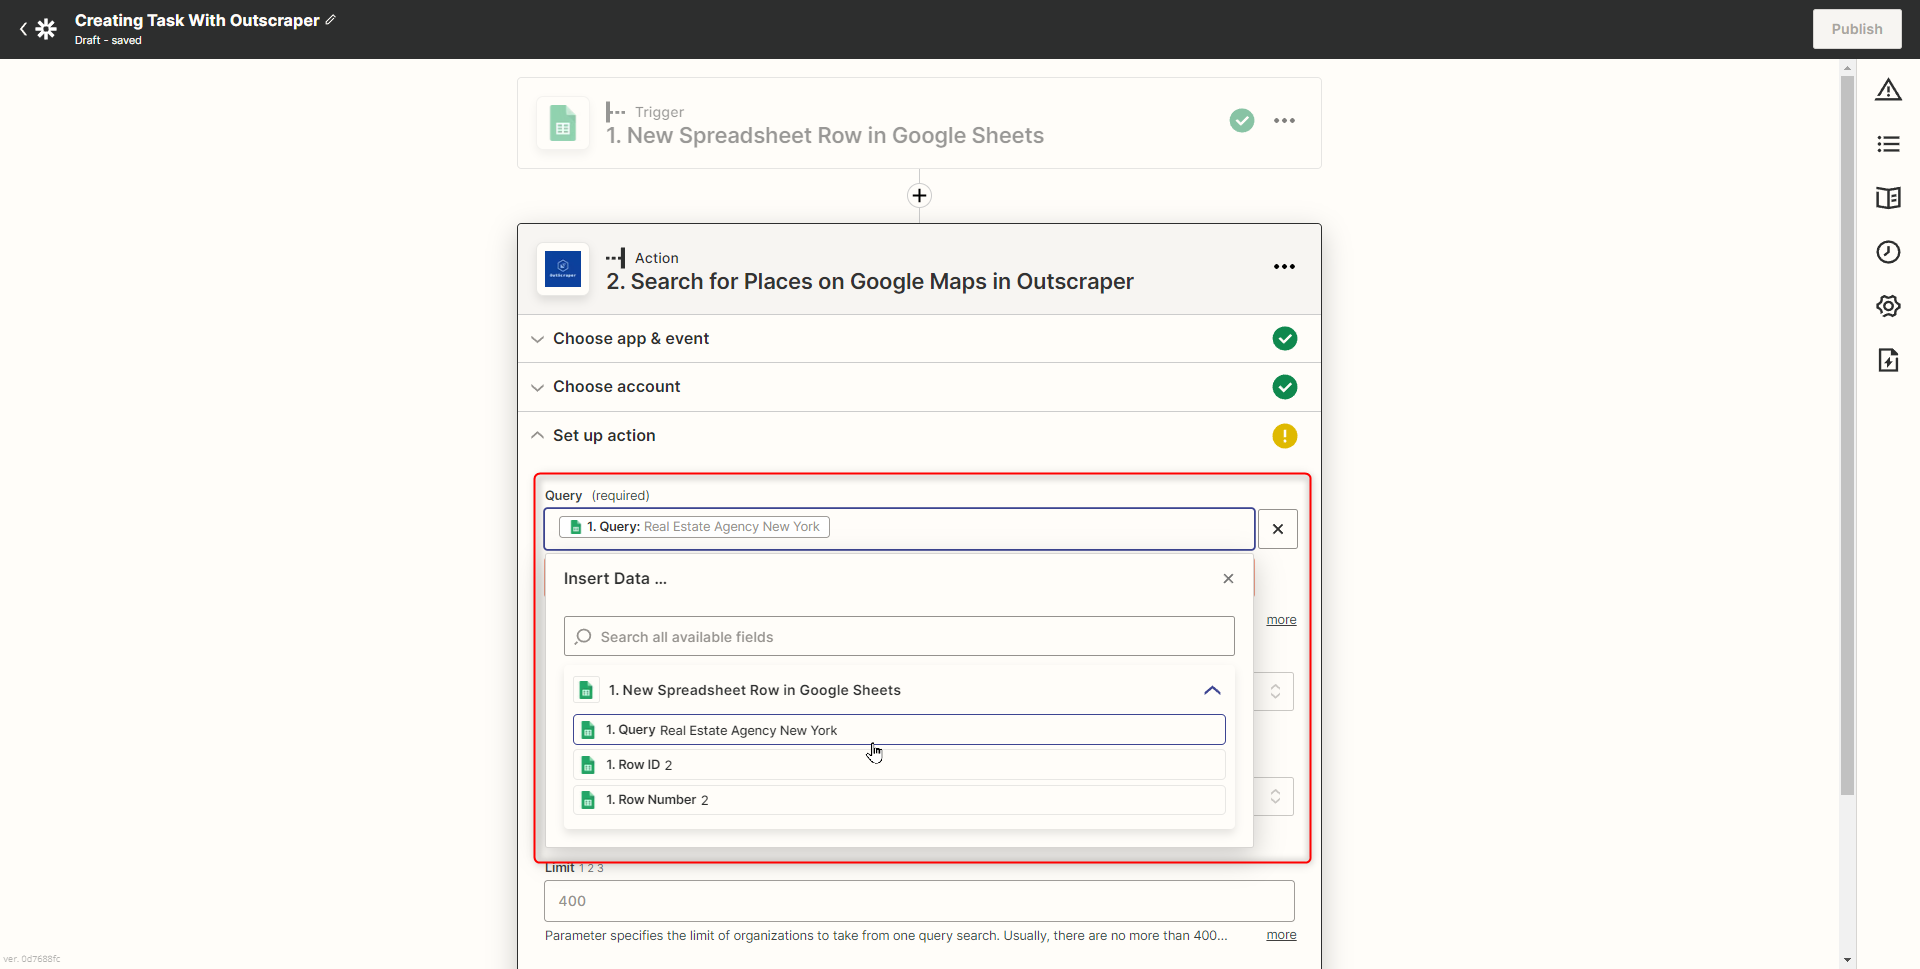
You can also set “Language, Region, and Limit” parameters from this screen. All queries will work according to the parameters here.
After setting the parameters, you can continue with the “Test & Continue” button. Zapier will create a test task.
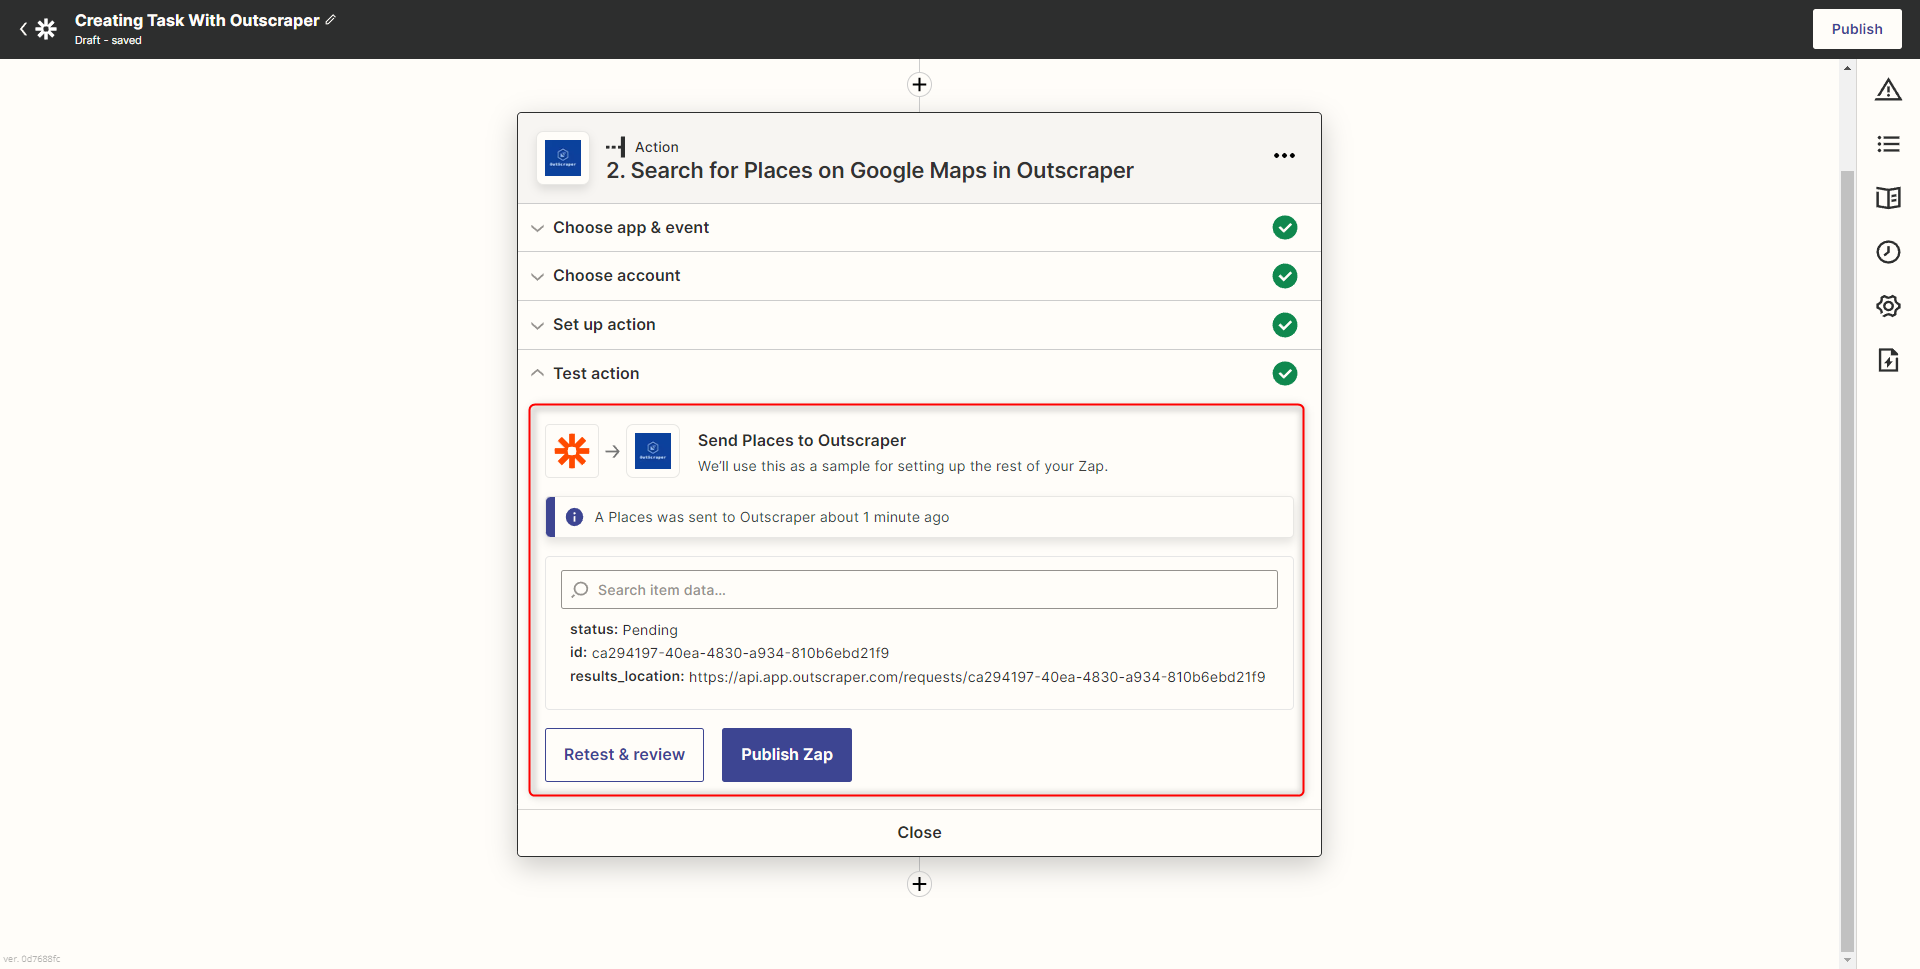
You can check that the results of the new task are listed by opening the spreadsheet file where the results were listed in the previous integration.

Task results are reflected in the list. The integration setup configuration seems to be successful. Zap workflow can now be published.
Now both Zap workflow setups are ready. All queries added to a spreadsheet will be scraped automatically by creating a task. And all results will be transferred automatically to another spreadsheet. Your Zapier integrations are ready.
Outscraper Google Maps Scraper Service Page
If you haven’t registered yet, you can now register for free and start using the Outscraper Google Maps Data Scraper service and combine it with all Zapier integrations.
FAQ
Most frequent questions and answers
You can pull data from Google Maps to Google Sheets with 2 services. Outscraper Google Maps Data Scraper and Zapier. Outscraper has a Zapier integration so that you can connect Google Maps scraping service to Google Sheets with a single zap.
Zapier is a web-based automation tool that allows users to connect different apps and services together. Zapier integrations, also known as “Zaps,” are pre-built connections between two or more apps that allow users to automate repetitive tasks and share data between them.
For example, you can create a Zap that creates Google Maps search queries with Outscraper Google Maps Data Scraper integration and save the results to Google Sheets.
One of the best automations for finding new customers and chasing new business opportunities is Outscraper Google Maps Data Scraper integration. With the Outscraper integration, you can transfer Google Maps results to Google Sheets and offer services to these businesses according to the data here.


0 Comments